HP Quality Center - Quickly get started
Chapters
Getting to know some commonly used features
The data is displayed in grid view or tree structure in HP Application Lifecycle Management (ALM) where user can manipulate the data in multiple ways, such as rearranging columns, sorting, filtering and grouping.
User can also attach files to the grid records can search for specific text in records, and view history of various entities.
The below are the features that needs to be understood to ensure that users are able to work with Quality center seamlessly.
Enter the ALM console from http://localhost:8080/qcbin/start_a.jsp URL
The commonly used actions are discussed below.
- Filter Dialog Box: Enables user to perform filter ALM data based on defined criteria.
Filter functionality in ALM helps user to view a specific data based on criteria.
Filters are applicable across all modules - Test Plan, Requirements, Test Lab and Defects.
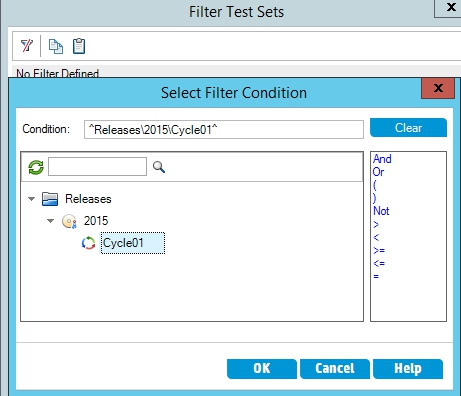
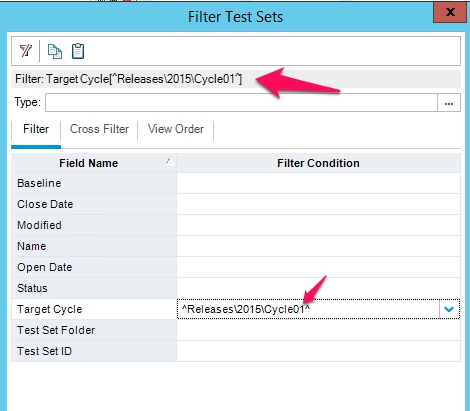
User can specify criteria in filter dialog box, here is an example of Filter for Test Sets (Test Lab):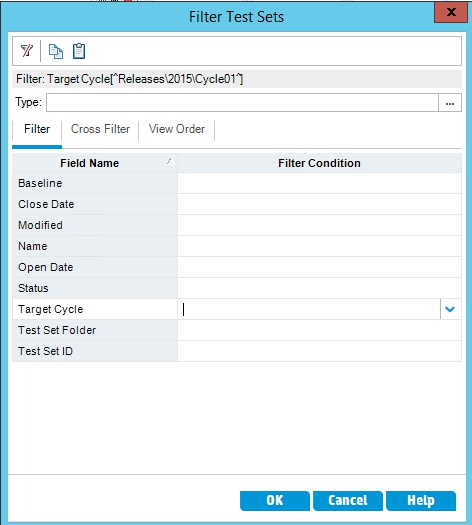
When "Filter" dialog box opens, Select a field and specify the Filter Condition and click "OK".
Combination of Filters - use "AND" or " OR" etc., as shown.
The main filter dialog displays the selected filter criteria.
Filter will now appear on your Test Lab main window. To clear this filter, click on Filter down arrow and click Clear Filter/Sort, A warning message pops up to ask you if you are sure, just press Yes there.
-
Users Dialog Box:
It allows selecting username from the list of users.
User is allowed to sort ALM users list, search for users, select users from the list and group users by user groups. Users list is available in all major modules such as requirements, Defects, Test Plan.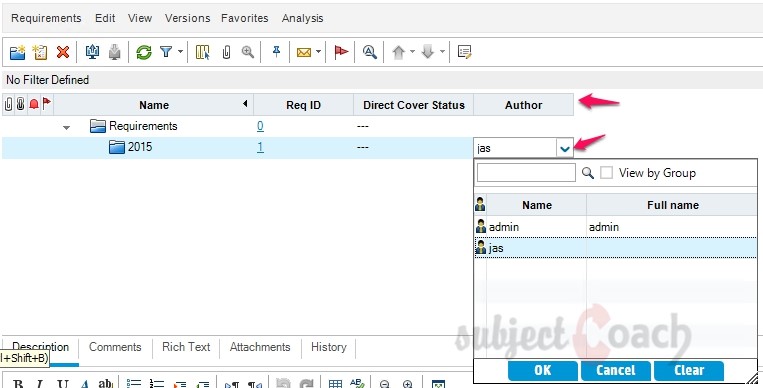
You can also click on "View by group" check box, to groupify users, that view is more group friendly.
- Find Dialog Box: Allows users to search for a particular record in a tree view or grid view.
Users can search or access records based on the value of a particular field, or record, a folder or a particular subfolder.
To access "Find dialog" by navigating to "Edit">>"Find" or press ctrl+F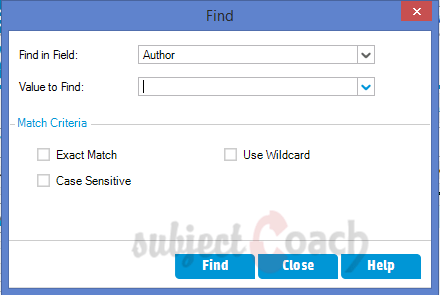
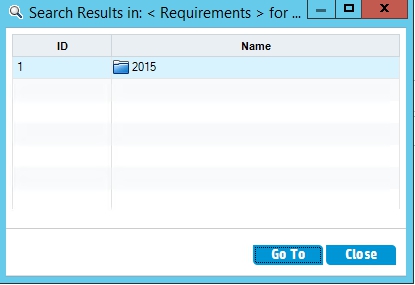
Enter the field name and value click "Find". Results would be shown in a small search results dialog.
- Find/Replace Dialog Box: Allows user to find and replace a specific field value in a tree or grid.
The Find and Replace dialog can be accessed by navigating to "Edit" Menu and select "replace" or "Replace all" appropriately.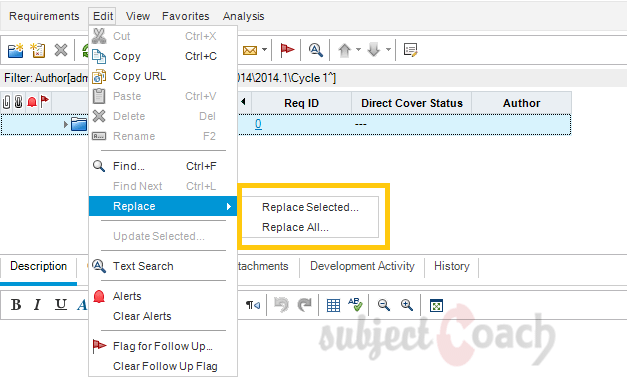
This feature does not support to replace "Ready only" Fields like "ID". Users can select the field to be searched and value to be replaced.
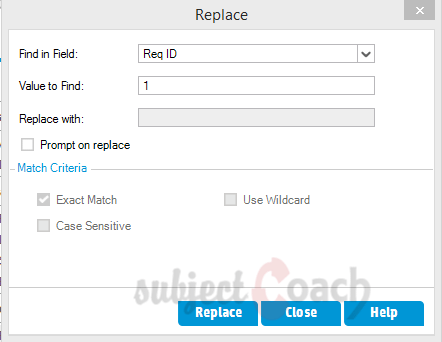
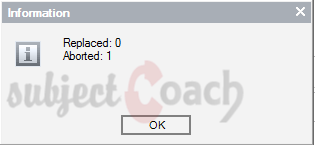
After selecting the criteria and replacing it, ALM displays summary of how many instances got replaced as information to the user, as shown.
- History Tab: Allows user to view all the changes made to the currently selected entity.
History includes date, old value, new value, time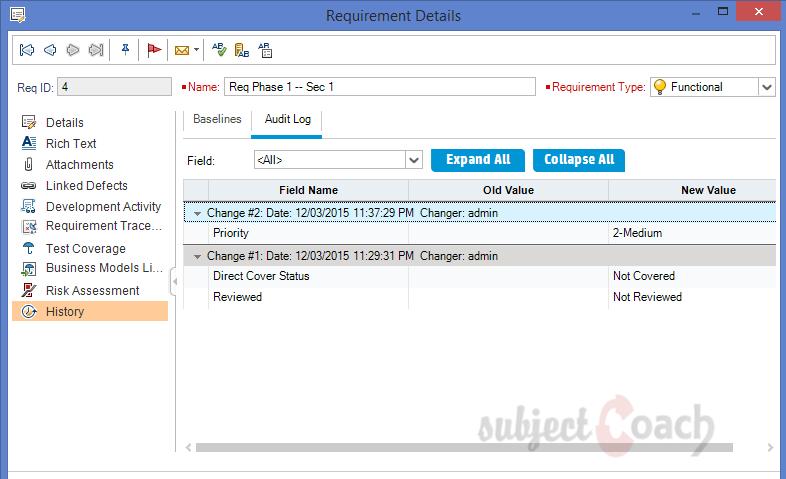
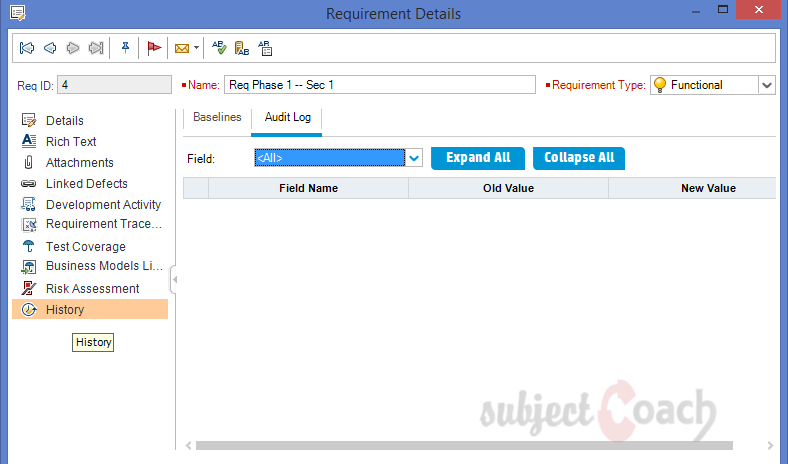
"Tools" >> "Clear History" will allow user to delete the history for a particular entity or for all entities by executing clear history.

Once history is cleared, users will not see the changes made to that entity. After clearing the history, section of history tab becomes empty and shown.
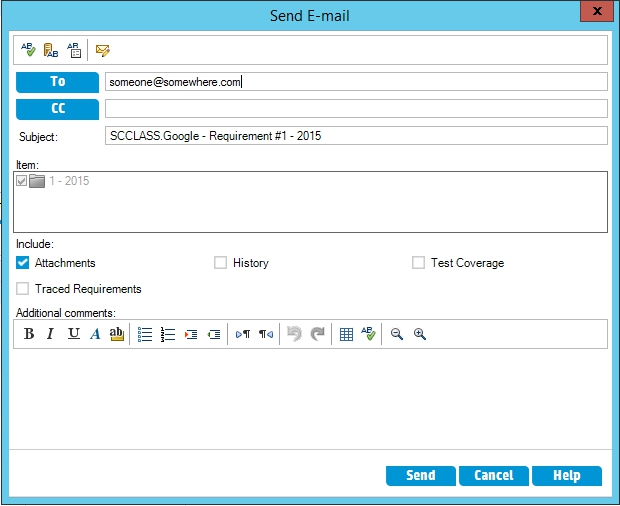
- Sending Emails: Allows quality center users to send an email about the details of an entity to other users.
The mail can contain attachments and also enables the recipient to directly access that entity. Send mail functionality can be accessed from all the modules by clicking on "send Mail" button as shown.
On clicking "Send Mail" button, send mail dialog opens up .User can enter the necessary values as shown
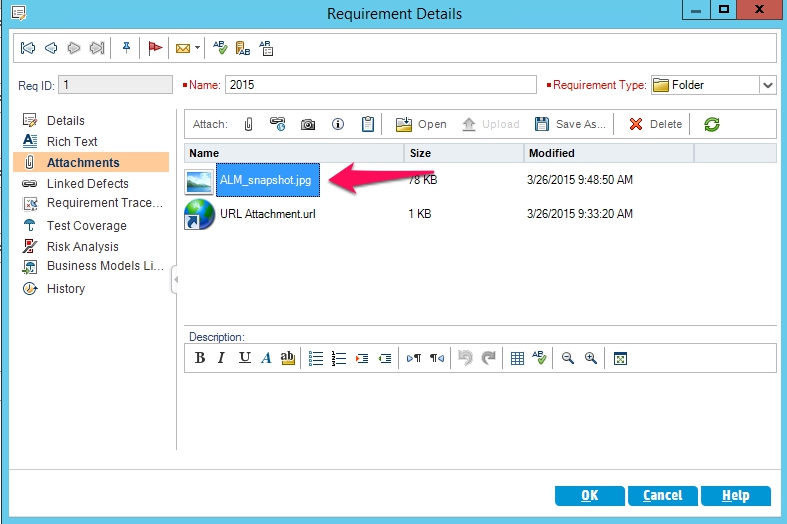
- Attachments Dialog: Allows users to add, edit and delete attachments to a specific record.
Users can attach a file, screenshot of the application under test or even some system information. By clicking on the "upload attachments" icon to upload attachments.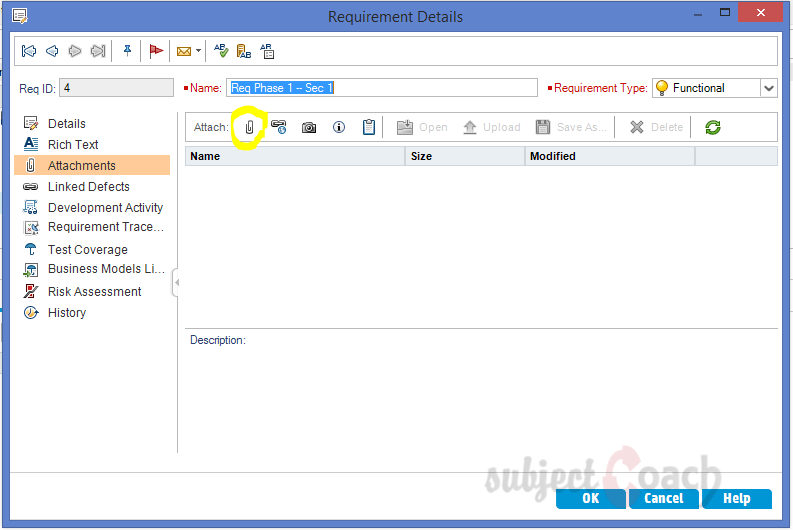
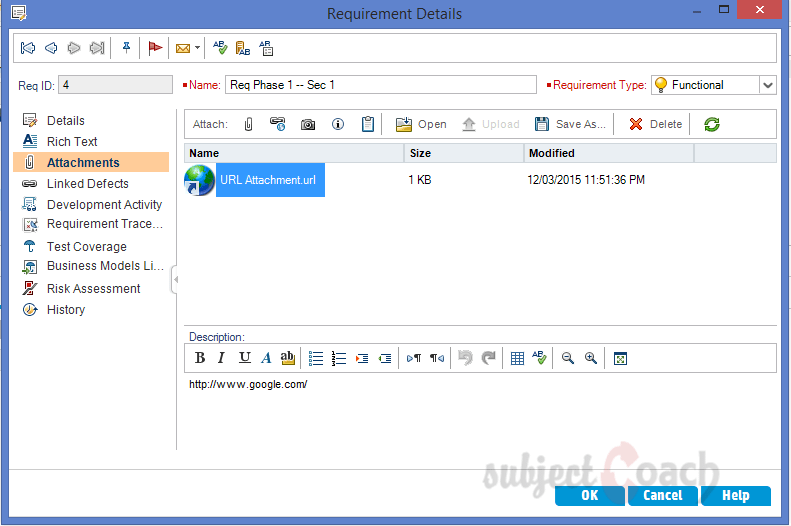
Users can also add "URL's" by clicking on the "Link" Button available from the menu.
After adding a URL, users can see the full URL in "Description" panel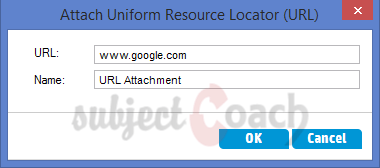
Some other important features are given below on attachment dialog are
- Open – User can open an already uploaded attachment.
- Save as - Users can save the file into local drive.
- Delete – User can delete an attachment in the attachment list.
- System Info - Captures all System related parameters automatically and adds it to the attachments list.
- Screenshot - Allow s active screen capture and uploads into the attachments pane.
- Clipboard - Clipboard allows user to can automatically upload data file
- Refresh All - Attachments pane gets refreshed.
- Snapshot Dialog: Allows users to capture and attach the screenshots to an ALM record.
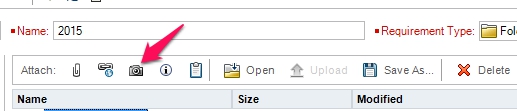
The Snapshot dialog opens where user can Zoom in and out and see on a normal scale.
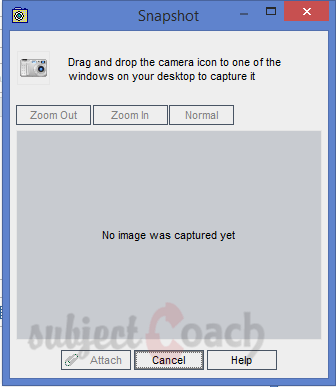
To take screenshot Drag the "Camera" icon and drop on the window which you want to take screenshot. Click on “Attach” button.
Once the screenshot is taken it is automatically placed in the entity. If there are two or more snapshot to an entity those will be named uniquely by HP-ALM.
- Column chooser Dialog: Allows User to hide and unhide the columns in the grid views. This option is available in Test Lab, Test Runs, Defect module and requirement.
User has to click on "Column Chooser" button.
Select any column and click on ">>" button. The selected column moves to visible columns list. After selecting the relevant columns, Click "OK" and user will be able to see the selected columns in the view.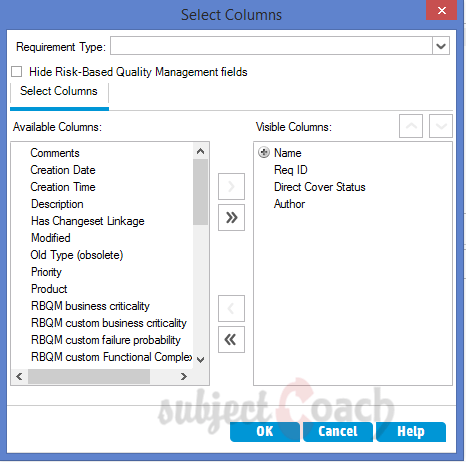
- Setting Defaults: Allows users to set default values for certain fields in ALM.
It is applicable for the modules - test configurations, new tests, design steps, and defects.
It can be found by navigating to "Edit" >> "Set Defaults".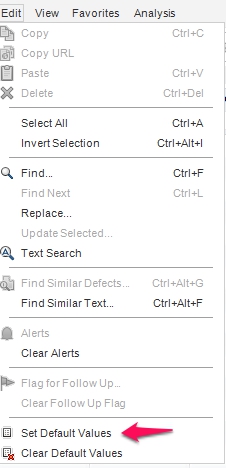
The Set defaults dialog opens as shown.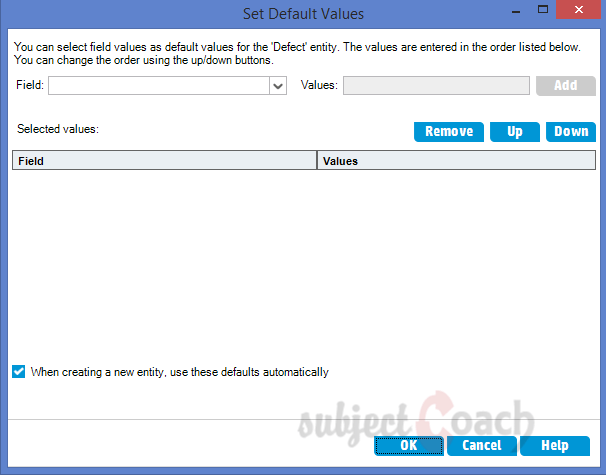
To select the field and default Field values from the dropdown that user wish to key in for that entity type.
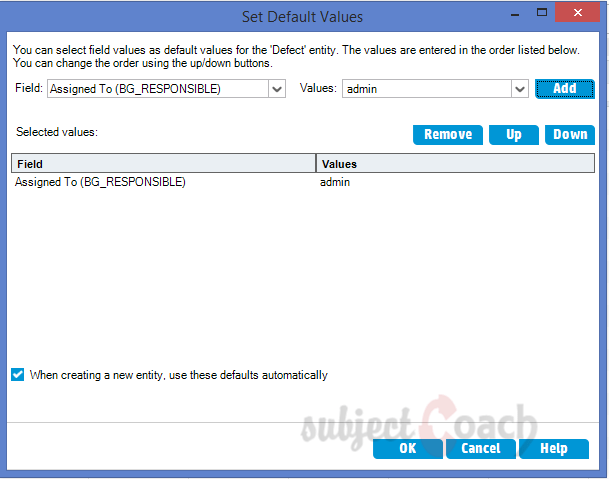
User can Add/Remove from the list of default fields using the appropriate buttons and also enable "when creating a new entity, use these defaults automatically" which will pre-populate these fields moment the user creates a new item of that type.
- Alerts and Flags Dialog: Allows users to view a list of alerts for a selected record and also allows them to create, modify and view a follow up flag to remind themselves to mark the issue.
"RED" colored bell symbol allows users to get alerted when criteria is meet.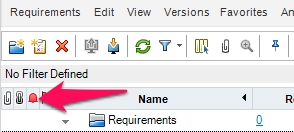
User should click on the "Red" Bell symbol to understand what the alert is all about.
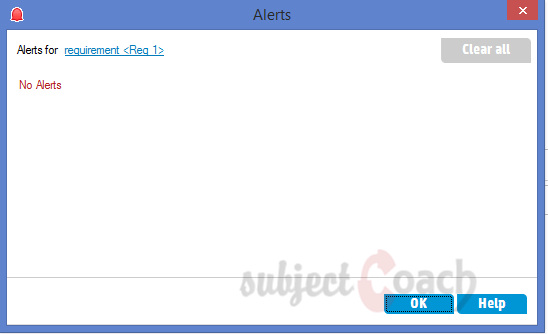
"Clear all" button allows the user to clear alert which will be shown on history of work items.
Flags
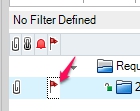
Users can also add a flag to a specific requirement, test instance, test, or a defect to as reminder for them to follow up on an issue. User can access the Flag functionality right from the menu buttons available in each one of the modules - Requirements, Test Lab, Defects and Test Plan.
User can select the Flag functionality right from the menu buttons, as shown below.

After clicking on "Flag" button, "Flag for Follow up" Dialog opens allows user to specify the date and brief description about the follow up as shown.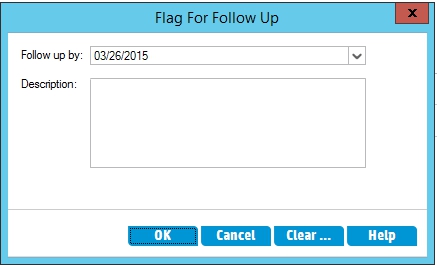
After adding a flag, it will display against that specific work item as shown. Users will be able to clear that flag anytime by clicking on the flag icon and hit "clear flag" button.
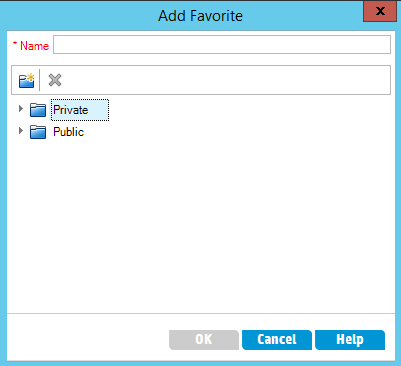
- Favorites Dialog: User can create, edit, delete and organize favorites.
User can also navigate to that page with just a single click, In ALM Favorites work which is similar to "Bookmarks" on a web-browser.
Favorites are of two types:
Private – can be accessed by the user who has logged in.
Public – can be accessed by all the users who have got access permission to that project.
Favorites are allowed in the following modules - Requirements, Test Lab, Defects and Test Plan.
"Add to favorites" button allows create Favorite as shown.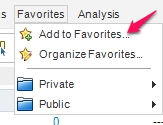
After Click on "Add to favorites" button, the "Add to favorite" dialog opens. User has to enter in the favorite name and the type of favorite either public/private, as shown below.
To access created favorites by navigating to "Favorites" menu section and select the type of favorite as shown,
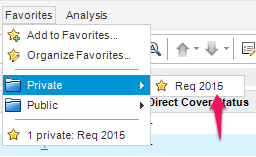
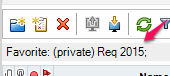
User can also verify if the favorites are loaded or NOT by looking at status bar. It will clearly display what are the filters are applied and the name of the favorite that was loaded as shown.
In next part of this tutorial we will explore Management tab
Description
Contents of this tutorial includes parts below
- What id HP Quality Center
- Environment Set up
- Configurations on Server Side
- Getting to know some commonly used features
- Management Tab
- Requirements
- Test Plan
- Test Lab
- Integrating QTP with QC
- Defects
- Dashboard Analysis
- Customization
This tutorial is to the point effort to quickly get you started with HP quality center.
Audience
Students looking to get started with HP Quality Center
Learning Objectives
Quickly familiarize yourself with HP Quality Center
Author: Subject Coach
Added on: 23rd Mar 2015
You must be logged in as Student to ask a Question.
None just yet!