HP Quality Center - Quickly get started
Chapters
Setting up Quality Center
HP ALM/QC installation is shown below with exact steps and screen shot below. You need to follow the steps in order to install and start HP Quality Center test management software on your machine.
Enterprise editions are licensed, for learning/evaluating purposes user can install the trial version of HP-ALM 11.5x on a standalone server.
Prerequisites should be taken care before successful installation.
Prerequisites for Installing QC:
Supported Windows Operating Systems:
Below are the list of Windows OS are supported, hence before installing that HP-ALM ensure that one of the below mentioned Windows OS is installed.
- Microsoft Windows Server 2008 Enterprise SP2 32 Bit/64 Bit
- Microsoft Windows Server 2008 R2 Enterprise SP1 64 Bit
- Microsoft Windows Server 2012 Standard 64 Bit
- Microsoft Windows Server 2012 R2 Standard 64 Bit
Supported Databases:
Below is the list of any one of the database which should installed before proceeding to install HP-ALM.
- Oracle 10.2.0.5
- Oracle 11.2.0.3
- Oracle 11.2.0.4
- Microsoft SQL Server 2005 SP4
- Microsoft SQL Server 2008 R2 SP1
- Microsoft SQL Server 2008 R2 SP2
Supported App-Servers:
Make sure that the server has got any of the below supported app-servers installed.
- Apache 2.2
- Microsoft IIS 7.0
- Microsoft IIS 7.5
- Microsoft IIS 8.0
- Microsoft IIS 8.5
Supported Browsers:
HP ALM supports only Internet Explorer, since it can be accessed only using Active X based browser,
- Microsoft Internet Explorer 8
- Microsoft Internet Explorer 9
- Microsoft Internet Explorer 10
- Microsoft Internet Explorer 11
HP ALM/QC Installation Steps:
Below are the steps to download the 30 day trial version of Hp-ALM from HP website.
Step 1:
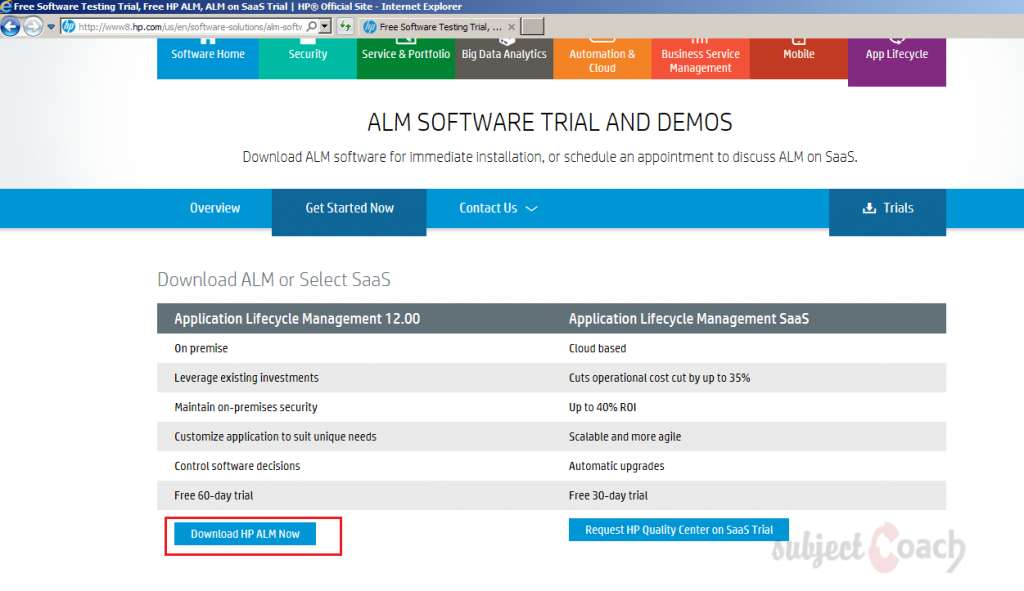
Download latest HP Quality Center/ALM software (HP ALM 12.0).
To do so, click the following link:http://www8.hp.com/us/en/software-solutions/alm-software-development-testing/try-now.html
Click on "Download HP ALM Now" as shown:
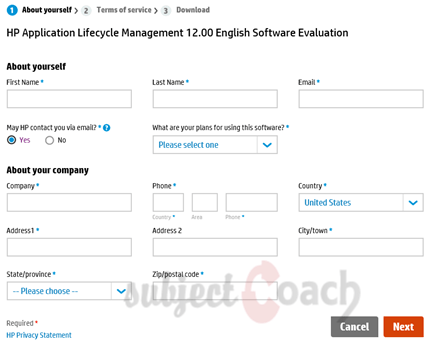
Step 2: Fill in all the mandatory details and click on "Next" as shown
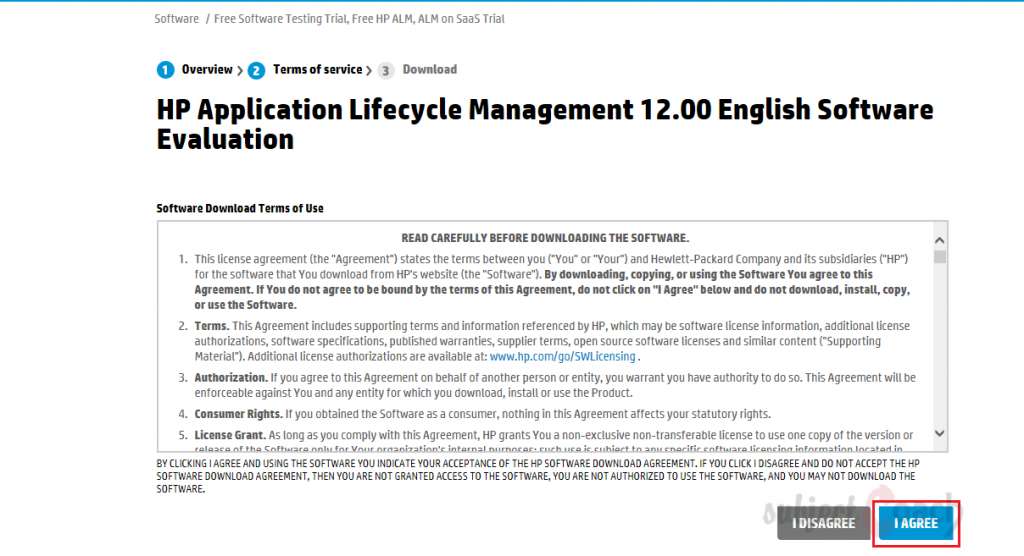
Step 3: Click on "I AGREE" as shown.
Step 4: Appropriate edition should be selected to install (windows/Unix) once Download link appears as shown below
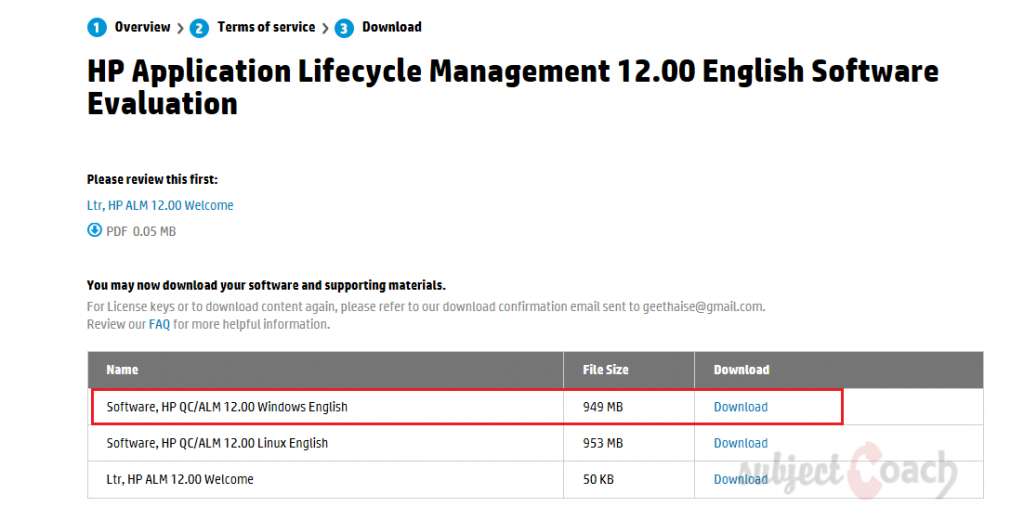
Tip: It’s recommended to use HP Download Manager or some other software as the installation file is big may fail to download due to network issues
Once the download process is complete, Please follow below Installation Procedure to install ALM.
Installing HP-ALM
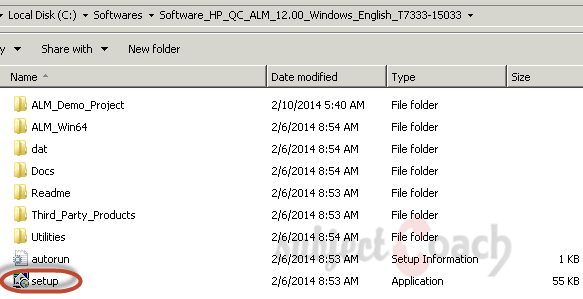
Step 1: Unzip the installer. Check for the below folder structure and right click the setup.exe and 'Run as Administrator'.
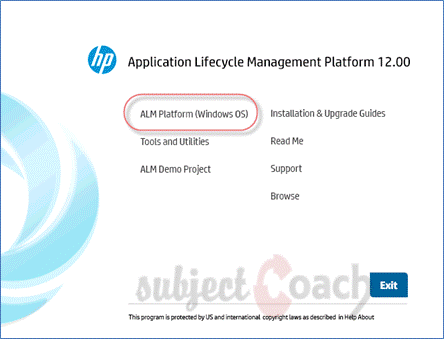
Step 2: For Windows environment select ALM Platform Installation. The extraction process will continue.
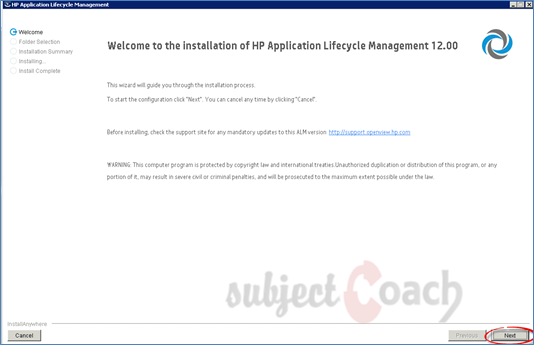
Step 3: Click on "Next" button after the Welcome page of Installation opens up.
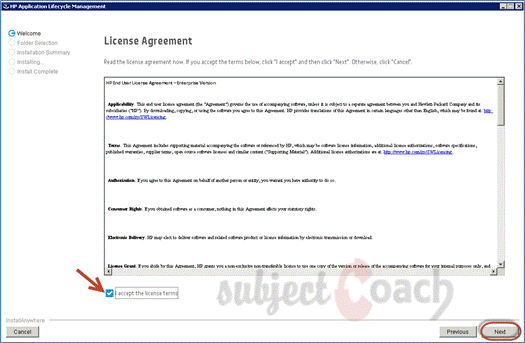
Step 4: After clicking 'Next' from welcome page, the license agreement dialog opens up. Accept the license agreement for user to proceed with the installation.
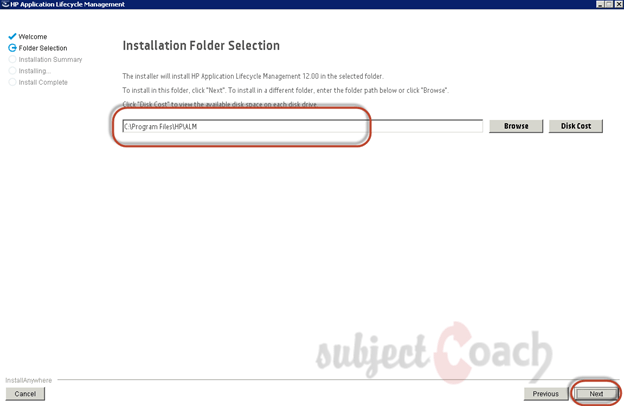
Step 5: The HP ALM will be installed in the selected location as shown
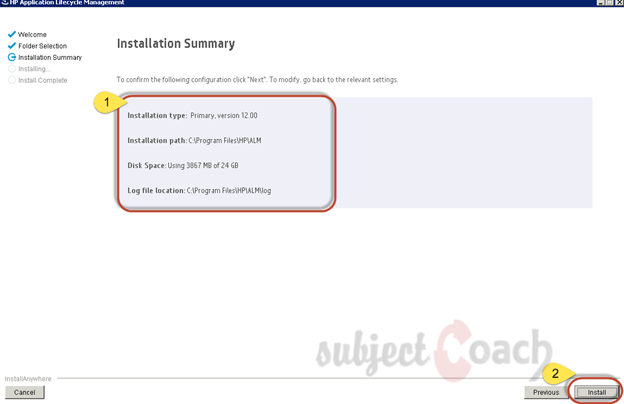
Step 6: Click Install button after the reviewing the Installation Summary which shows to the user before commencing installation process.
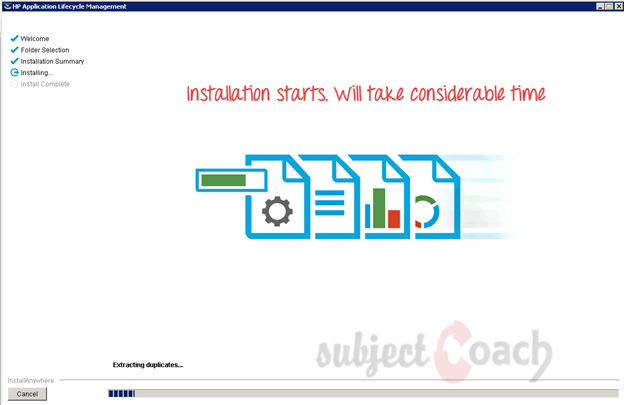
Step 7: Installation process kicks off after clicking the “Install” button in Installation Summary Dialog box.
Step 8: Below status displayed after completion of installation
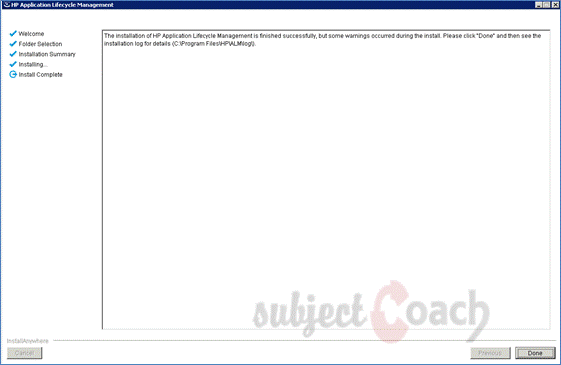
Once successful installation complete, the installer will continue to do server configuration
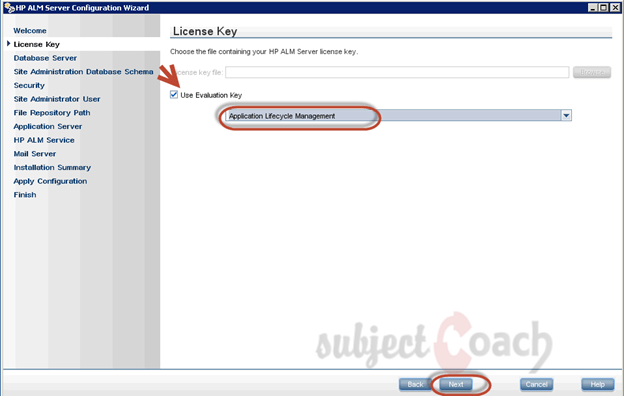
Step 1: Select 'Application Lifecycle Management’, Use 'Evaluation Key' and click 'NEXT'.
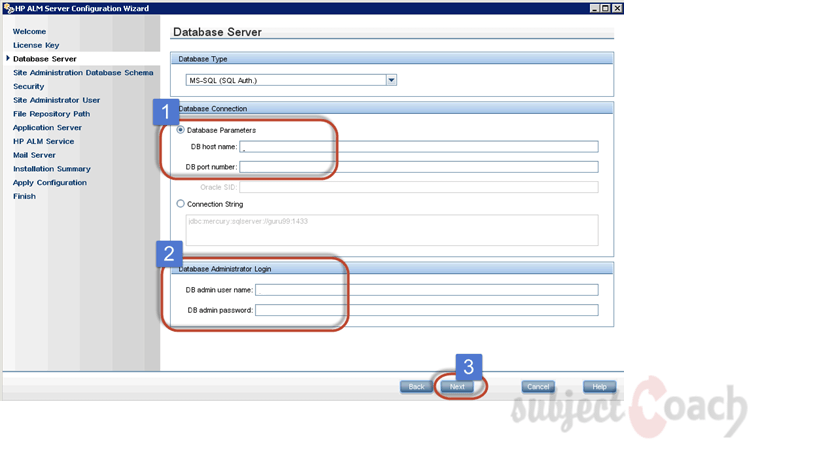
Step 2: Configure Server Details. There should be preinstalled oracle/MS SQL Server. Select the appropriate database credentials and click 'Next'.
Note :
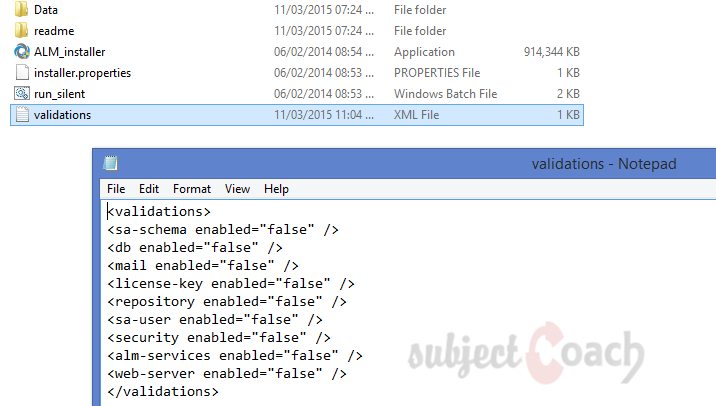
If the database validation fails, then this can be skipped by setting validation xml to false.
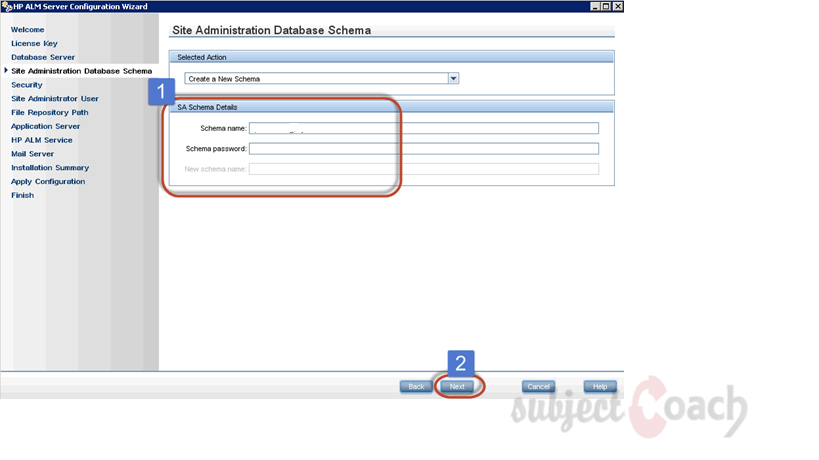
Step 3: Enter the Site Admin Database Schema Name and Schema Password. After entering the details, Click 'Next'.
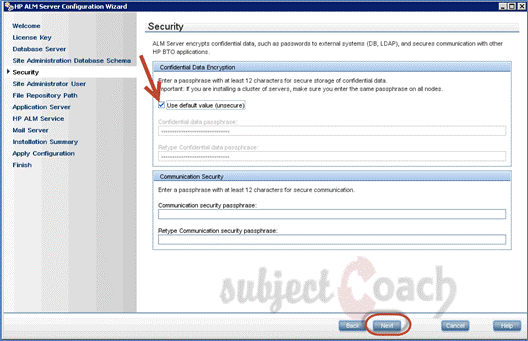
Step 4: Check 'Use Default Value' in the Security page in the server configuration wizard and click 'Next'.
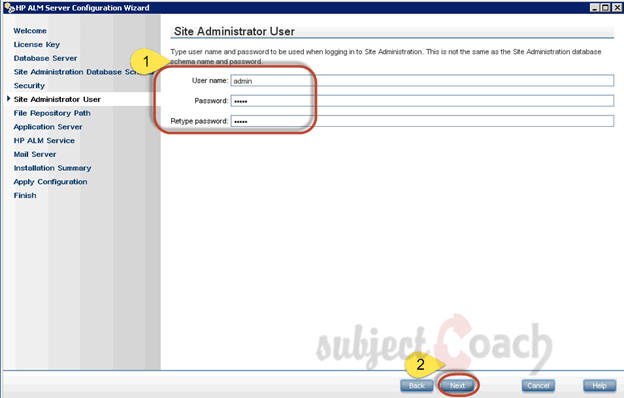
Step 5: Enter 'Site Administrator' User name and Password.
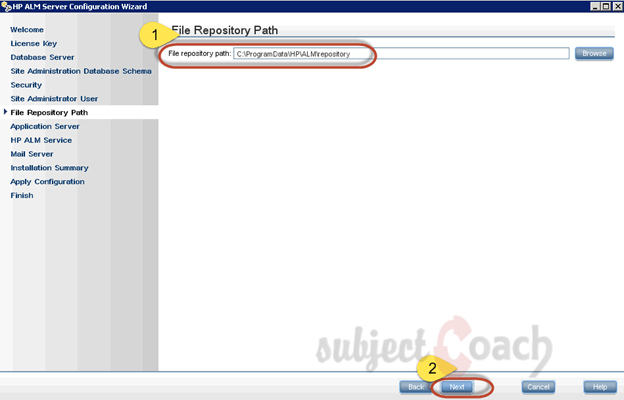
Step 6: Select the path for File Repository where all the ALM Data would be stored.
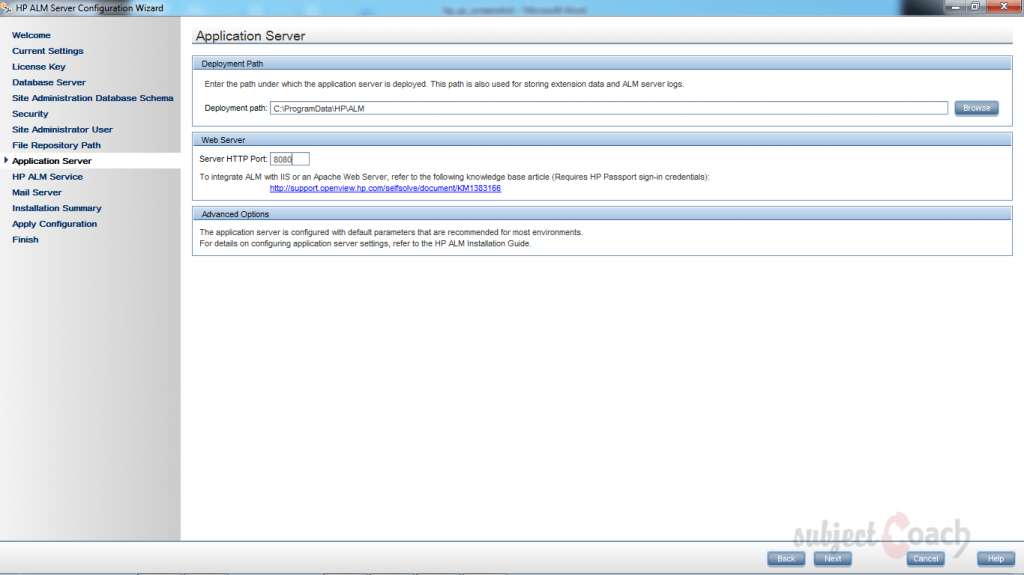
Step 7: Select the Port for the Application server that they would like to install. In this below case 8080
(8080 is default port which can be overridden) and click 'NEXT'.
Note: Better to choose other port numbers since the Default Port 8080 might be used by other application
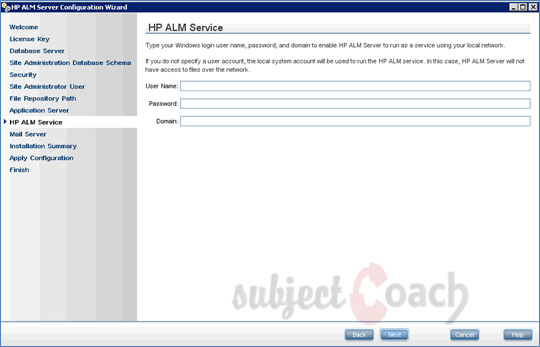
Step 8: Leave the HP ALM Service as blank as user Windows login credentials would be used by default. Click 'Next' to continue.
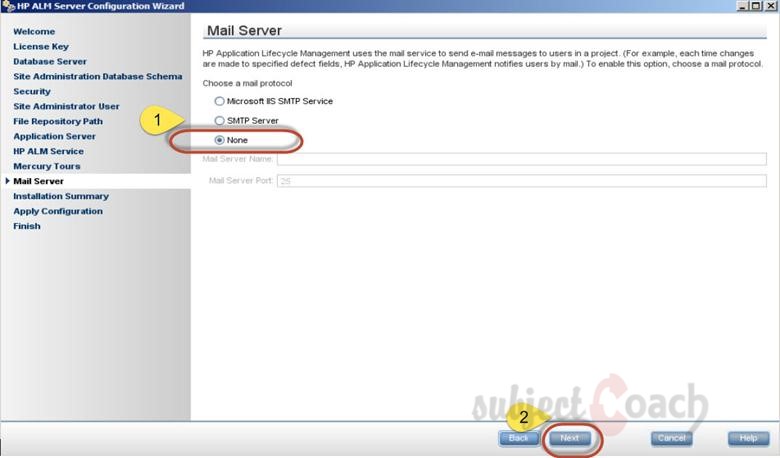
Step 9: Enter the server detail to setup Email server for HP ALM. This is used to send emails using HP ALM. If you do not want to specify, select none and move forward
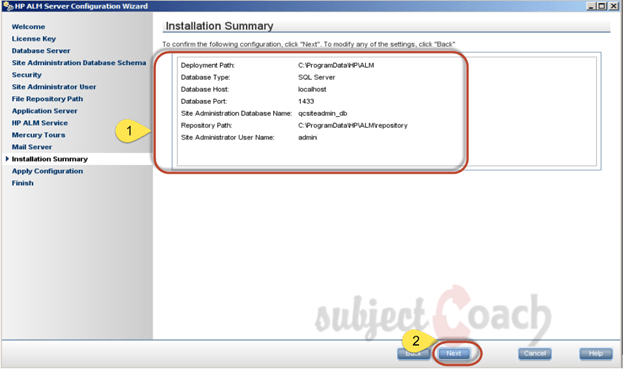
Step 10: Verify the configuration summary as shown before proceeding. Click Next
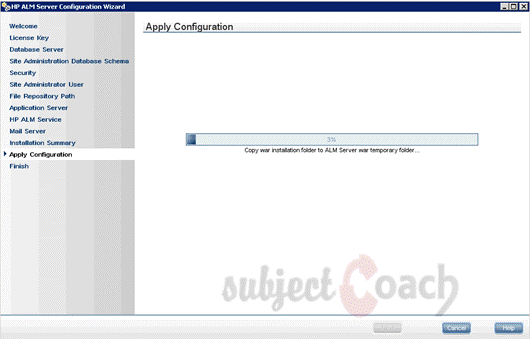
Step 11: Configuration proceed as shown
Step 12: Status message would be show as below on applying the configuration is successful. Click 'Finish' and Check 'Start ALM Server’ to start ALM service.
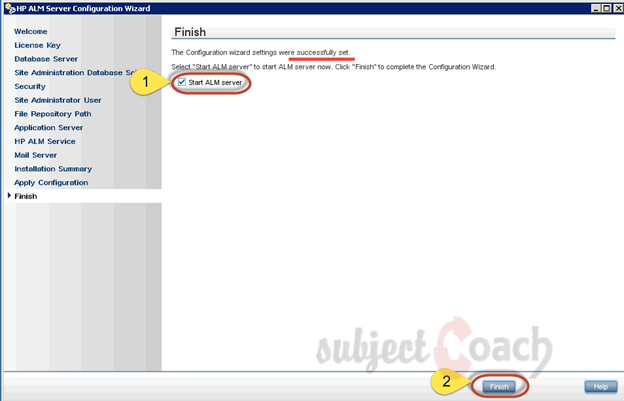
Once the Installation completed successfully, Now Launch HP-ALM
How to Launching HP-ALM?
Option 1: After successful installation of HP-ALM, the ALM can be launched from the Start menu > HP Application Lifecycle Management > Application Lifecycle Management.
Option 2: User can also launch ALM by giving the following URL in Internet Explorer and ALM would be opened as shown

After you see above webpage, you can be sure that everything worked as per installation as required. Now from here we are ready to take things further and start configuring our server side. In next part we will cover configuring ALM.
Description
Contents of this tutorial includes parts below
- What id HP Quality Center
- Environment Set up
- Configurations on Server Side
- Getting to know some commonly used features
- Management Tab
- Requirements
- Test Plan
- Test Lab
- Integrating QTP with QC
- Defects
- Dashboard Analysis
- Customization
This tutorial is to the point effort to quickly get you started with HP quality center.
Audience
Students looking to get started with HP Quality Center
Learning Objectives
Quickly familiarize yourself with HP Quality Center
Author: Subject Coach
Added on: 23rd Mar 2015
You must be logged in as Student to ask a Question.
None just yet!