HP Quality Center - Quickly get started
Chapters
Working with Test Lab
This module helps the testers to execute the created test cases. Tester can schedule, post defects, run and analyze using this module.
The functionalities in Test Lab modules are as follows:
Creating Test Set:
A test set contains a set of the test cases that are designed to achieve specific test goals. Once Test Plan module is completed, testers organize test execution by creating test sets in the Test Lab module.
HL ALM supports different types of test sets are listed as below:
- Performance
- Functional
- Default
Below is the step to create test sets in Test Lab module.
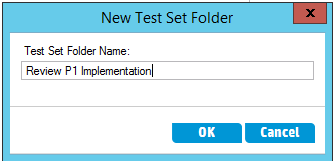
Create a folder for having the test sets. Give the Name in-line with the release and cycle so that it is easy for tracking.
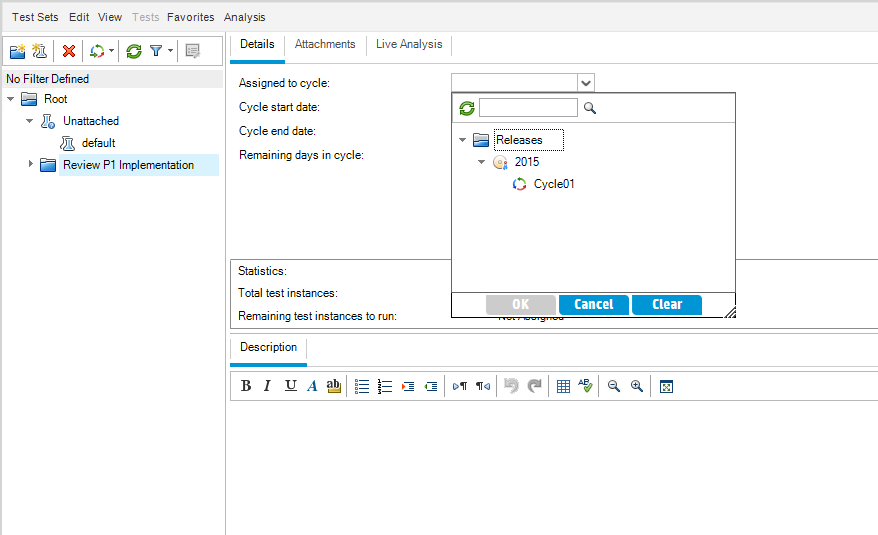
After creating folder, testers should assign it to a specific cycle on folder level. Only if it is mapped to a particular cycle, user can track the test results based on a cycle.
We've create a test set folder, You can now add description, type and are also able to attach documents, if you would like to, to create a new test set. After creating a test set, it can be accessed using details tab. Here are couple of screenshots showing creating a test set and accessing its details
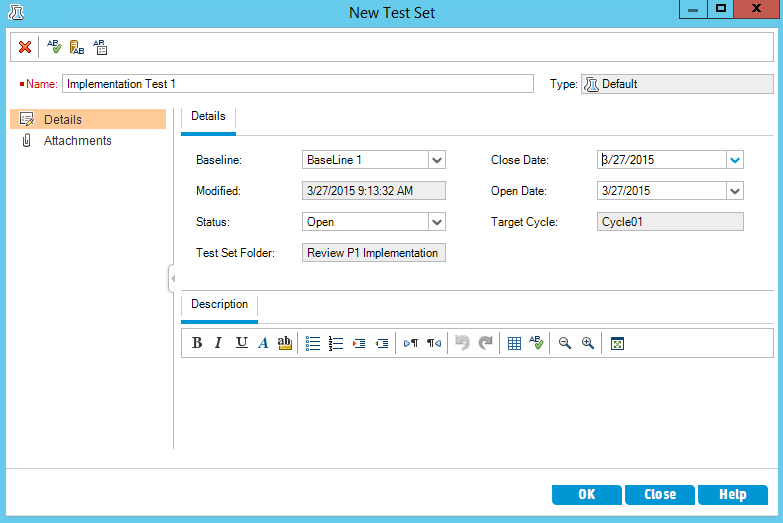
Here is the details window for the test set we've created above
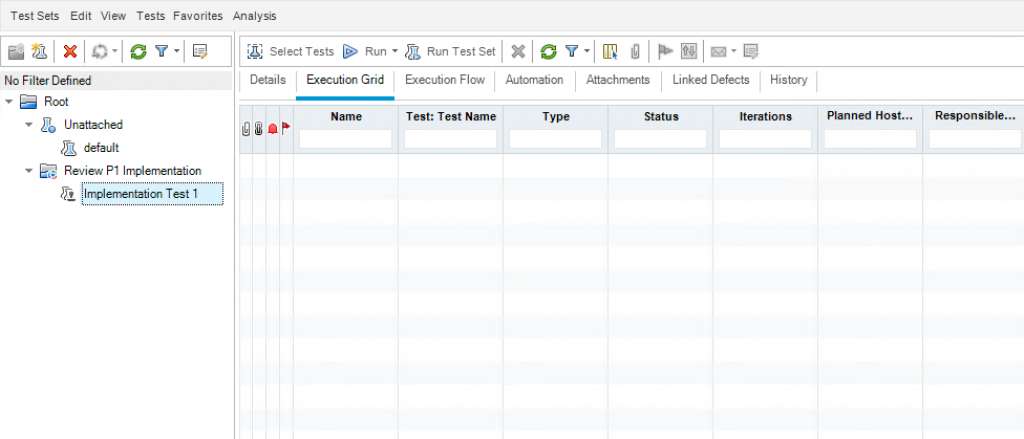
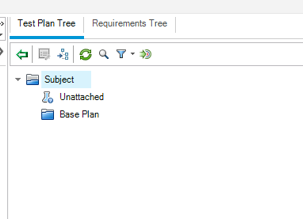
Select "Execution Grid", the "Select Test" Button would be activated, Click on this button and a test plan tree will open up as shown
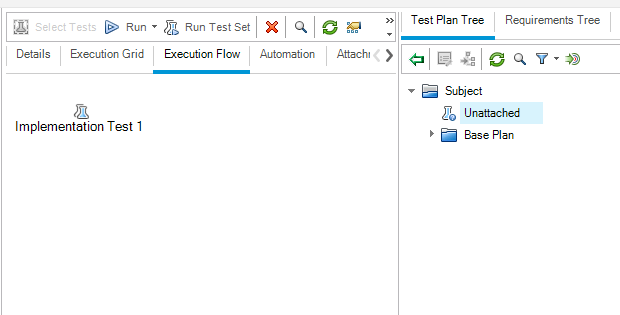
"Execution Flow" tab show how the tests are organized.
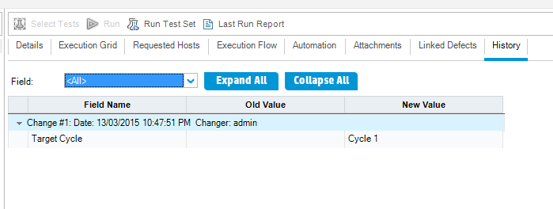
"History" Tab shows the sequence of changes that this particular test set created by user.
Test Run Schedules:
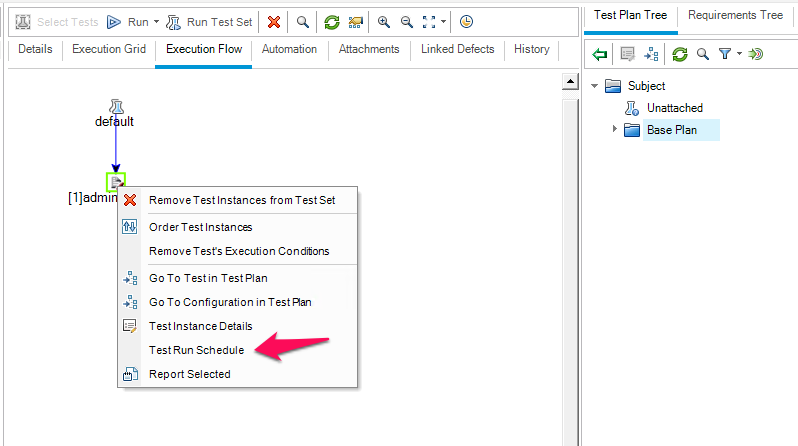
The test execution can be controlled using "Execution Flow" Tab. Testers can specify a date and time, and set conditions for executing a particular test instances. The step by step procedure to schedule the test flow in HP-ALM
Step 1: Select "Execution Flow" tab from Test Lab module.
Step 2: Right click on the test instance and select "Test Run Schedule".
Step 3: Click on "+" icon. “Run Schedule” window opens up as shown.
Step 4: New Execution Condition window opens up. In this window user can select the test precondition for the selected test. User can make it as a prerequisite to pass or finish the test before the selected test is executed.
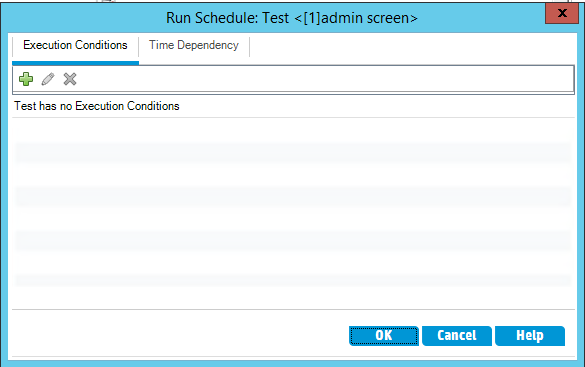
Step 5: Run Schedule window shows the option that is selected by the user. Please note that the Execution flow realigns automatically and will be refreshed.
Time Dependency setting
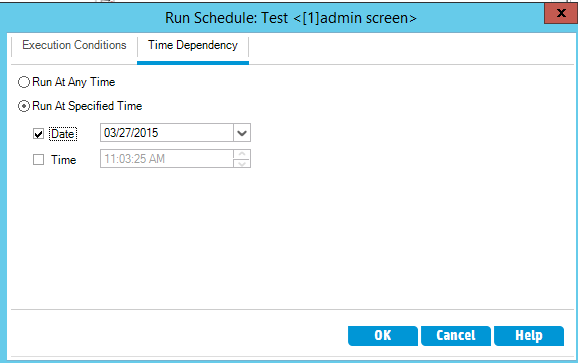
The above process can be repeated for Time Dependency setting which will be triggered only after that specified time.
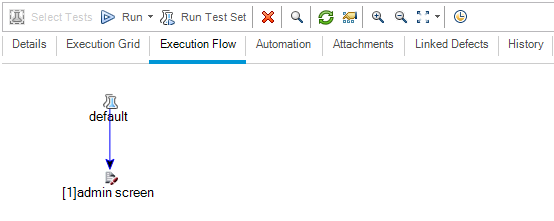
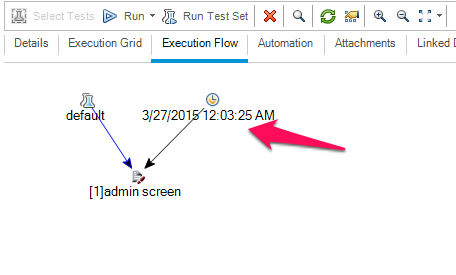
Here is an updated view of Execution flow
Test Execution:
Allow testers to execute the test/test set.
Once creating a test set, scheduling is done test execution comes into the picture. Upon Execution we compare the actual result against expected result and raise defects if any.
Following are the steps for test execution.
Step 1: Select the tests to execute and click on Run Button. Three options would be shown to the user.
Step 2: The First Option, "Run with Sprinter" can only be used when sprinter is installed in the system.
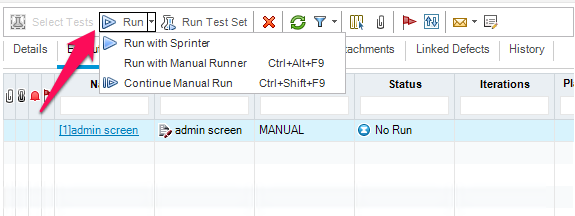
Step 3: The Second Option, "Run with Manual Runner" is the option for executing tests manually. The manual runner window opens as shown
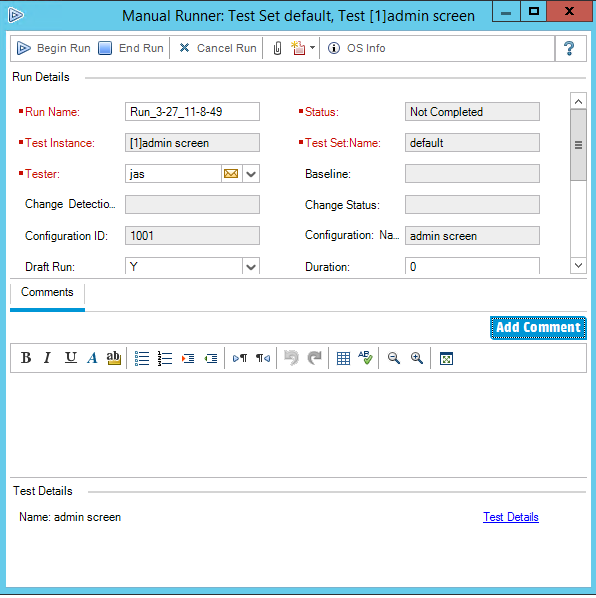
The following functionalities are in manual runner dialog.
- Begin Run: To start the execution of Manual Tests case
- End Run: User can exit the execution at any point of time by clicking on "End Run" button.
- Cancel Run: User can cancel the execution at any point of time.
- New Defect: Manual runner window is used raise new defect.
- OS info: Operating System information is displayed.
Step 4: Click on “Begin Run” and the Manual runner opens up with all the manual steps as shown.
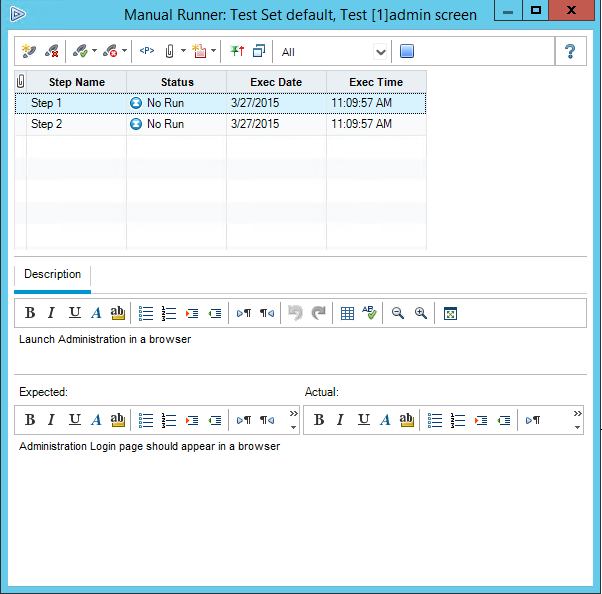
Following options are available during execution.
- Add Step:User can add new steps at runtime.
- Delete Step: User can remove a step at runtime if redundant.
- Cancel Run:The execution can be cancelled at any point.
- Pass Selected:The Selected Step can be marked as Pass.
- Pass All: All the Steps in the test can be marked as Pass.
- Fail Selected: The Selected Step can be marked as Fail.
- Fail All:All the Steps in the test can be marked as Fail.
- Parameters: Shows the list of parameters that was added as part of the testcase.
- Attach to Step: Allow user to attach a file to a particular step.
- Attach to Run: Allow user to attach a file on a test set level.
- Add Defect: User can add a defect by selecting the step and clicking on "Add a Defect".
- Filter: User can filter based on the status like - completed, blocked etc.
- End Run: Even while execution is in progress, User can end the execution.
- Description: Description of the steps is shown.
- Expected: Displays the expected result of that step.
- Actual: Tester can fill in the actual result.
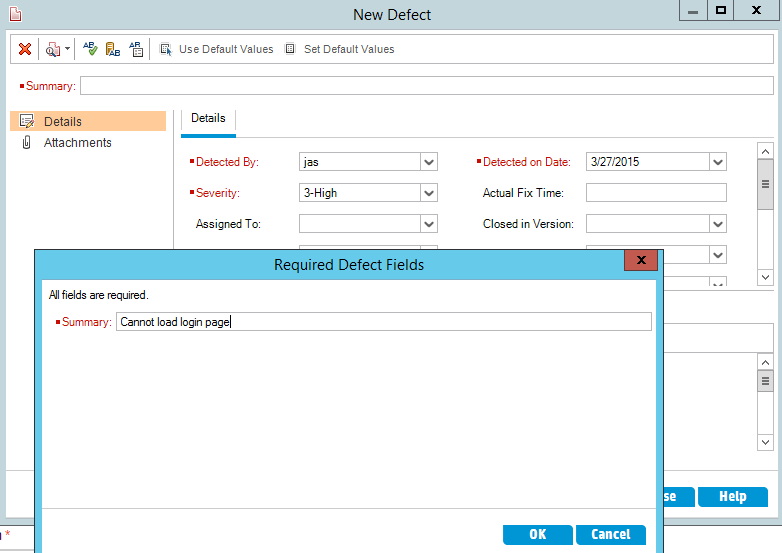
Step 5: Defect raising in just a click away while the execution in progress, which pre populates the step details such as description and expected result which is very useful for users and easy for developers to investigate in detail.
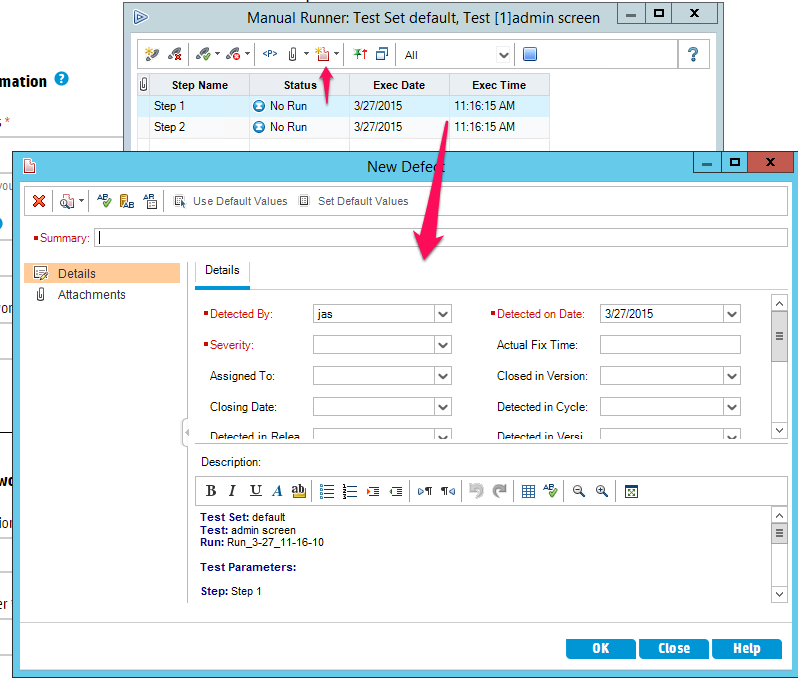
You will also have to add summary for the case as shown below
Test Results:
Allows testers to analyze the test results.
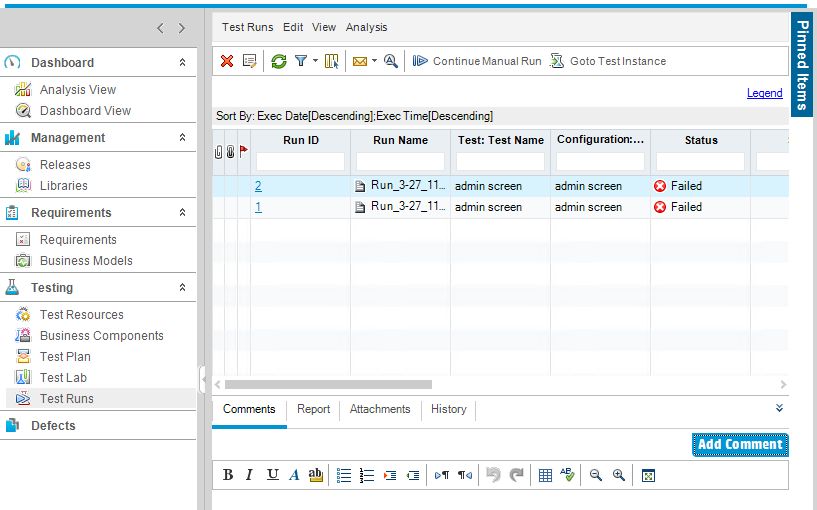
Features of Test Run Tab.
- Delete: User can delete a particular test Run and also controlled by user privileges.
- Details: The details table show full details of test case
- Continue Manual Run: Allow testers to continue with manual run if suspended in-between.
- Comments: Allows testers to add comment to the test run.
- Report: Displays the details of the Run with steps and its status of execution
- Attachments: Allow testers to add attachments for that particular execution.
- Run ID: HP-ALM assigns a unique run ID (Date- TimeStamp) automatically for easy tracking.
- Exec Date: Allow testers to track the test execution based on execution date.
- Exec Time: Allows testers to track the test execution based on execution time.
- Host: Displays the host system detail on which the test was performed.
Go to "Test Runs" in "Testing" Tab and the window opens as shown.
Description
Contents of this tutorial includes parts below
- What id HP Quality Center
- Environment Set up
- Configurations on Server Side
- Getting to know some commonly used features
- Management Tab
- Requirements
- Test Plan
- Test Lab
- Integrating QTP with QC
- Defects
- Dashboard Analysis
- Customization
This tutorial is to the point effort to quickly get you started with HP quality center.
Audience
Students looking to get started with HP Quality Center
Learning Objectives
Quickly familiarize yourself with HP Quality Center
Author: Subject Coach
Added on: 23rd Mar 2015
You must be logged in as Student to ask a Question.
None just yet!