HP Quality Center - Quickly get started
Chapters
Project Customization
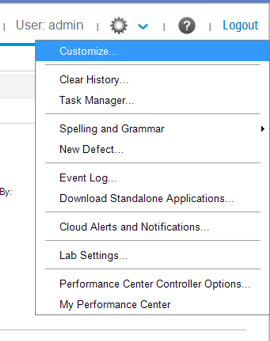
Project Customization module can be accessed by going to "Tools" >> "Customize" as shown:
When a project administrator’s accesses project Customizations then following modules would be shown to the user for customizations.
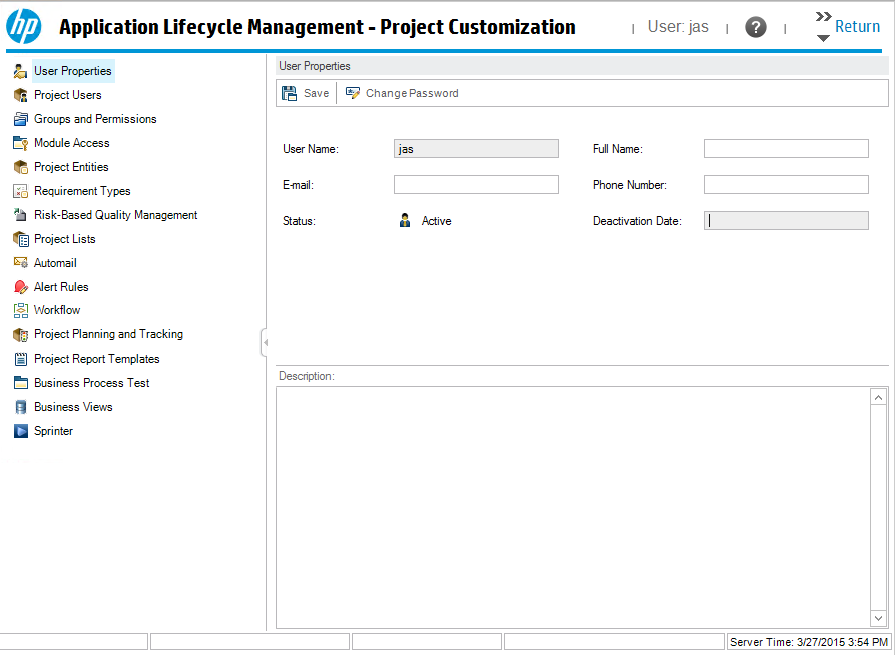
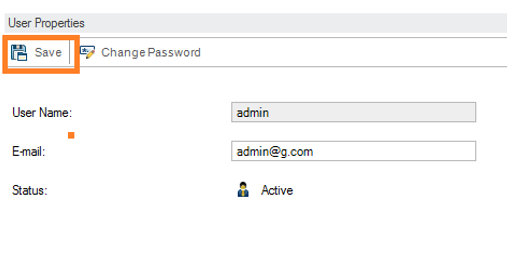
User Properties:
User properties module helps to customize their user profile information’s such as user name, email ID and change password.
Click "User Properties" Link which is on the left pane of the project customization window.
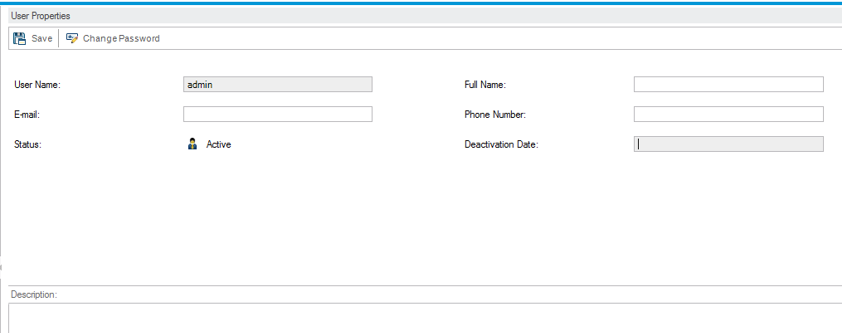
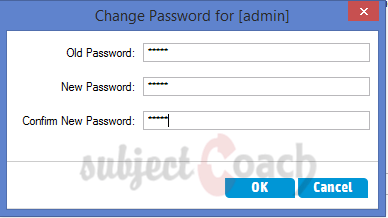
For password Click on "Change Password" button on user properties pane. Current logged in user’s credentials can only be changed.
Users can also update profile information and click on save button.
Project Users:
This module helps us to add a list of valid users from the overall ALM users list. In addition to that we can also assign each project user to a user group. Each user group has specific permissions to perform certain tasks.
Click on "Add user" button which in project users module.
The "Add user" dialog will open. The project administrator has to key in the user name in order to add user successfully.
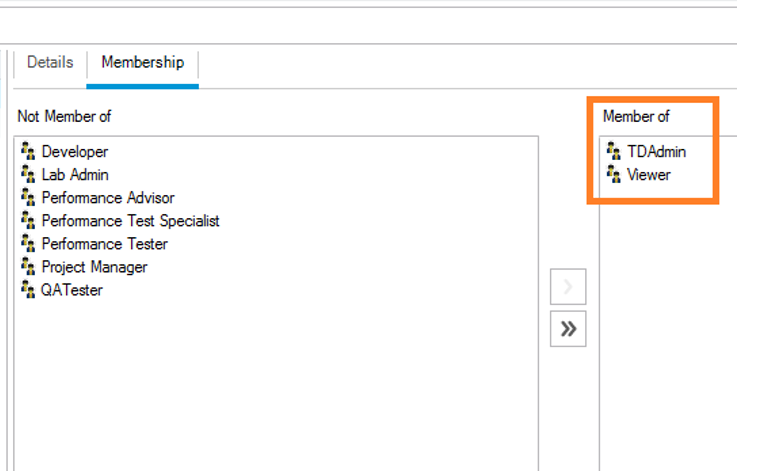
After adding the user successfully, select the user to whom the membership level has to be edited. Select the Membership level and click on ">>" button
Project Administrator can also remove a user from the project area using "Remove user" button. Remember this will just remove the user from the project areas and it will still retain the user in HP-ALM site Administration.
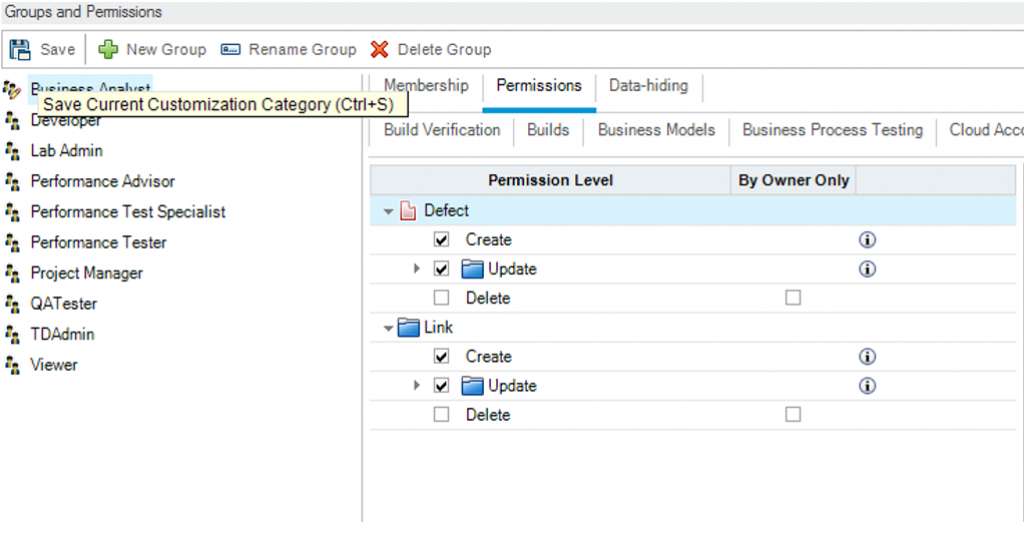
Groups and Permissions:
To protect a project from unauthorized access, ALM enables project administrator to assign each users to one or more predefined with default privilege that have access to perform certain ALM actions.
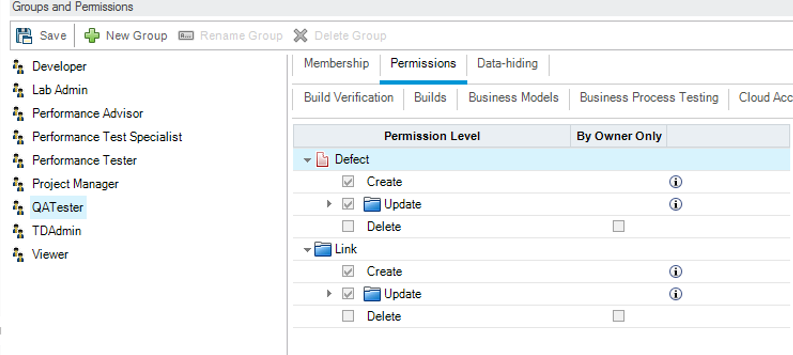
Select "Groups and Permissions" link and users will notice that there are five user groups by default.
The below group and permissions are known as System groups and are "READ ONLY". The Permission of those CANNOT be modified (Edit/Remove) even by projects administrator.
- Developer
- Project Manager
- TD Admin
- QA Tester
- Viewer
Each one of those user group display membership’s information which shows the user "In group" and "Not in group".

The Next tab "Permission" show the permission level for the selected "Group". It is READ ONLY and cannot be edited for the above said default group. It show that the group "QA Tester" has permission to create and update defect but can't delete.
In case users want to create a customized user group, they can do so by clicking "New Group" button and select the name of the group and type of profiles they would like to create.
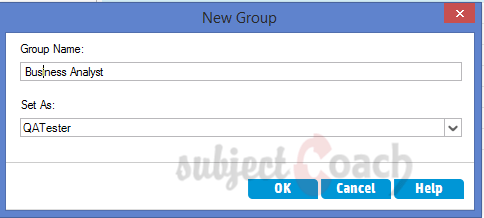
In the below scenario, we allow "Business Analysts" user group to create and update requirements but cannot move/delete. We can customize each one of the area such as tests, defect according to our requirement
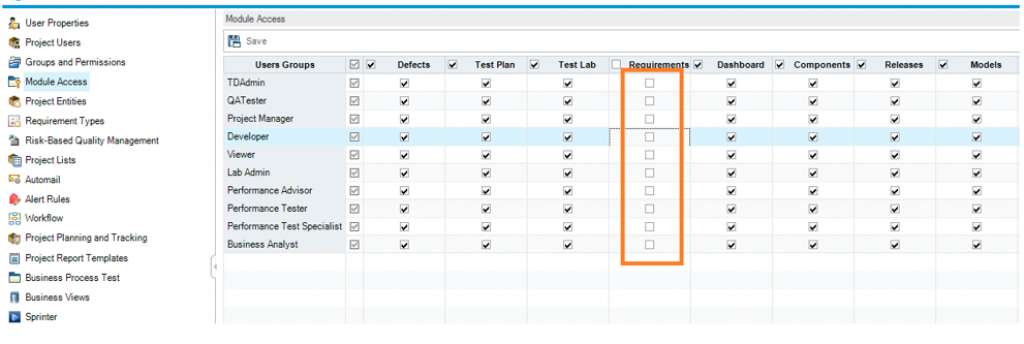
Module Access:
Module Access allows project Administrator to control the level of access for each one of those user groups that we discussed in group and permission module. By Default all types of user have access to all modules however they are NOT allowed to perform all action which are controlled in permission module.
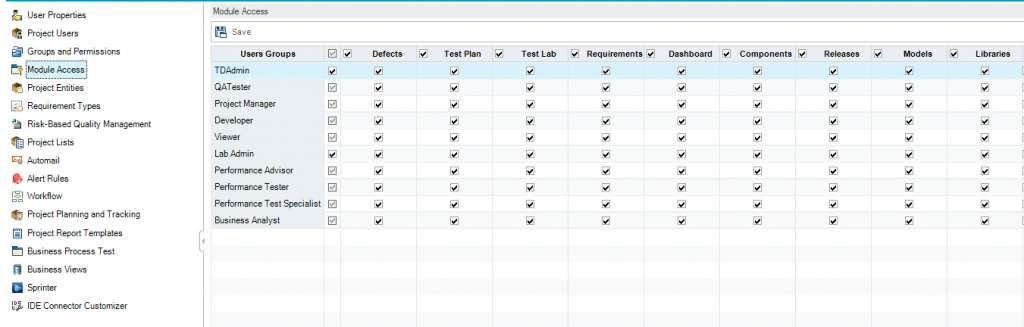
As per below snapshot, users can turn off Test plan module for user group "Business Analyst". Similarly components and model module are turned off for all user group.
Project Entities:
This module deals with how to create/edit/delete customize field.
Sometimes project administrator would be in a position to customize a project to meet the specific needs of project. Hence we might have to add or customize field, customize requirement type, and create categories and list to meet the needs of the project. We should also keep in mind that the System field are default field and cannot be added or deleted but can be modified. Let us understand this topic with an example. We will add a user defined field "Build Number" as a text box in "New defects" Module.
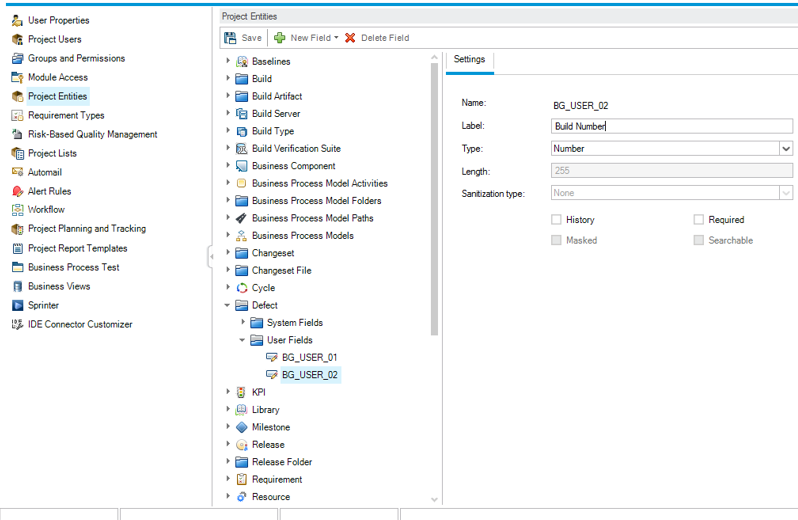
Step 1: Go to Project Entities and select "Defect". Click "New Field" Button after selecting the "User Field" folder.
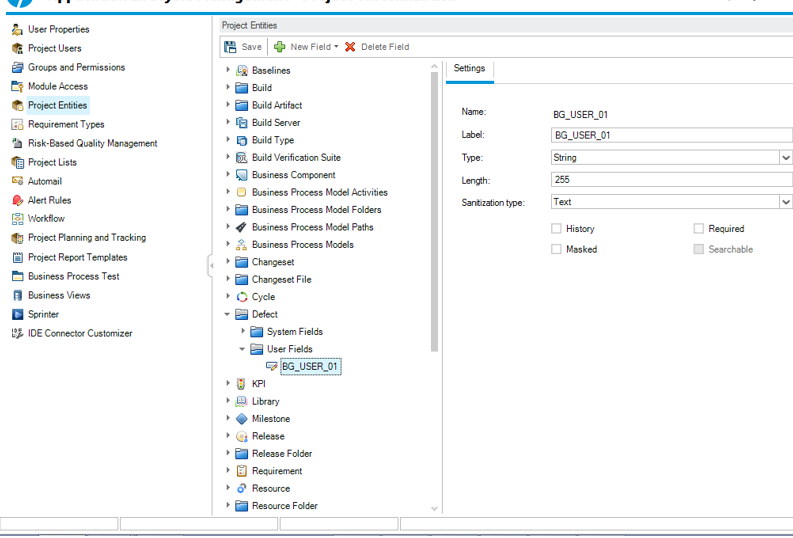
Step 2: Enter label names and select the correct data types "String/Date/User List/lookup List/Number/Float". We can also make it as "Required" Field so that user has to enter that fields in order to successfully post a defect. After creating the user defined field click "Save" as shown.
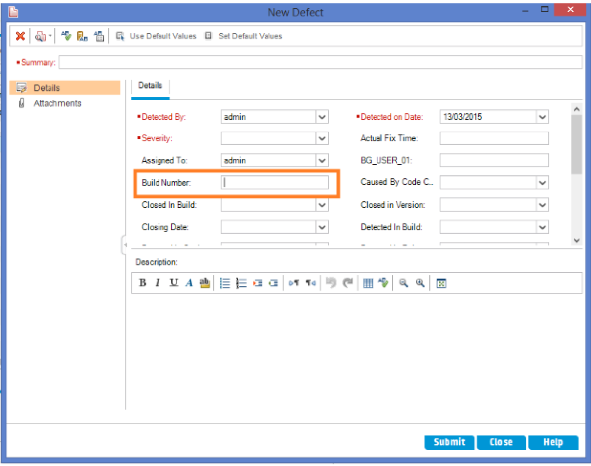
Step 3: Click "New Defect" Button in defect module. Enter all mandatory fields as shown.
Step 4: Similarly we can create user defined field across modules wherever necessary.
Note: For creating a user defined Look up lists one has to create the list using project lists and the select the list while creating a user defined field.
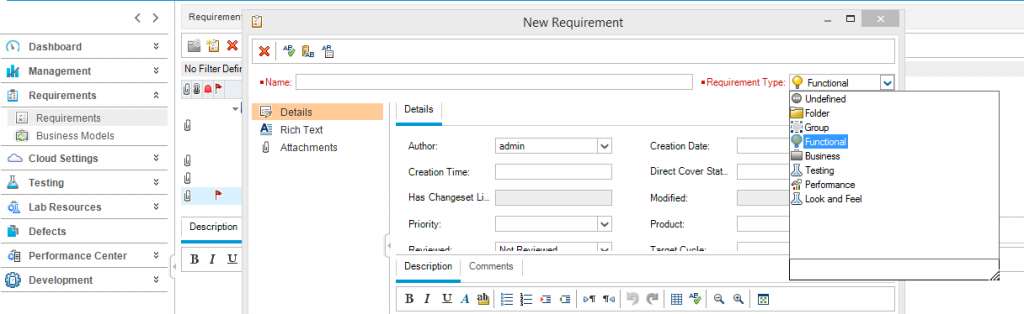
Requirement Type:
This module helps us to create different requirement type and also allow us to customize their properties.
Requirement type are shown as a list to the user in "Create Requirement" page.
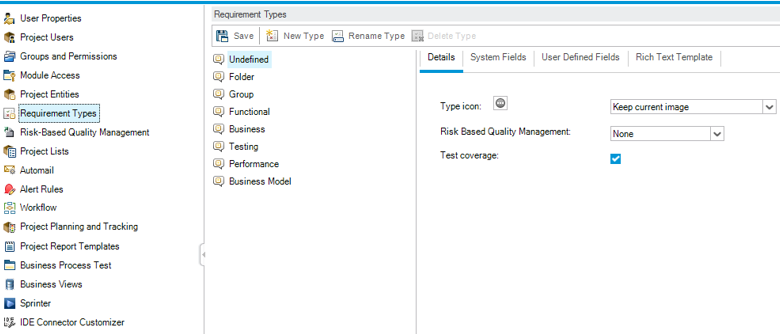
Project Administrator can create a new requirement type and map it against a predefined requirement type. Requirement type has got System Field, User defined field and Rich Text Template associated with it.
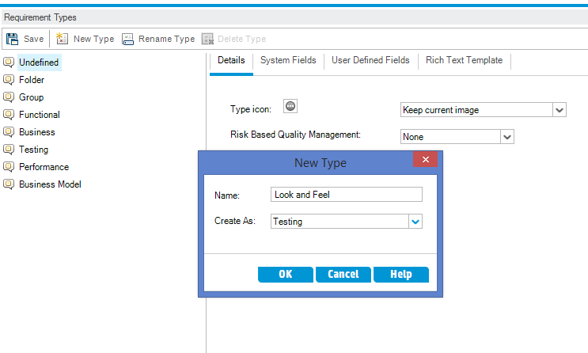
Project Admin can also "Rename" or "Delete" a user defined requirement types, After creating a new requirement types, Users can choose the created requirement type while creating new requirement
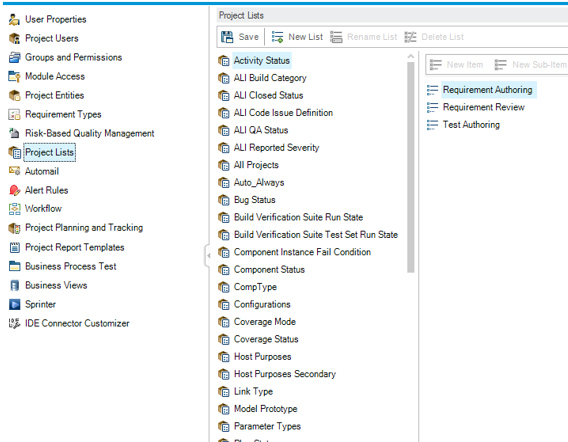
Project Lists:
Project List module allow user to create, rename, and delete user-defined list.
The default System list is shown below.
Project Admin’s can create a user defined list (say language list) and add items to the list.
While adding item to the user defined field, user can add it as a main item or a sub item. They also have access to rename/delete the user defined list.
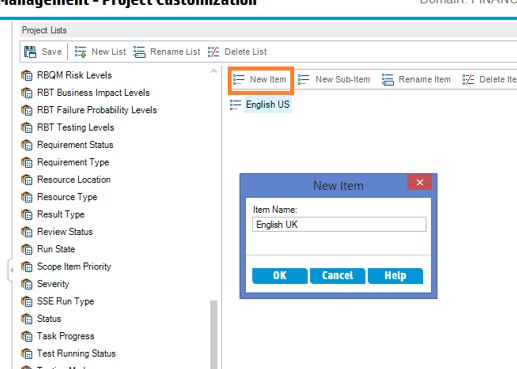
System defined list cannot be altered (delete or renamed), however new item/sub item can be added to the list.
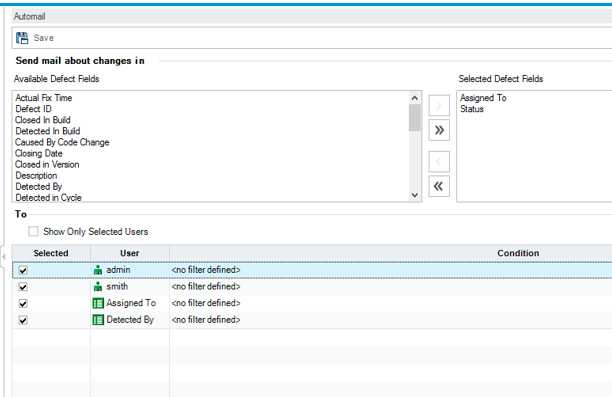
Automail:
ALM enables the user to automatically notify them via email each time a specific defect field change.
Configuring mail for an ALM project involve the below step:
Step 1: Click the link "Automail" Link in "Project Customization" page.
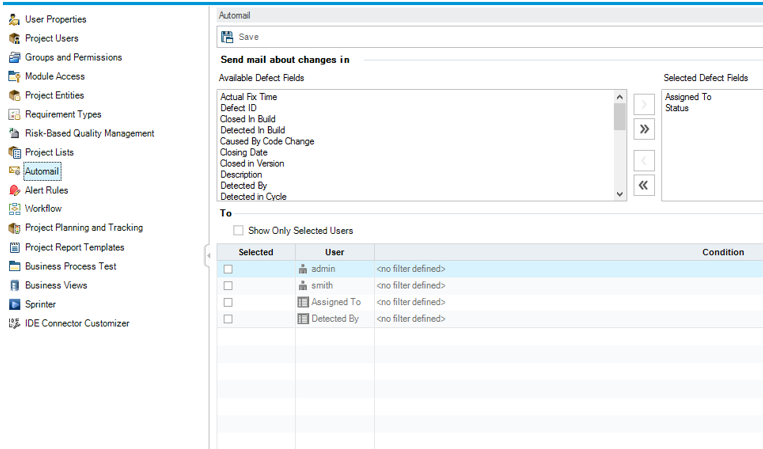
Project Admin can select, under what circumstances mail should be triggered. Project Admin can also select as many fiels as they can and select "To" user. User can also filter the criteria the project user to receive an email.
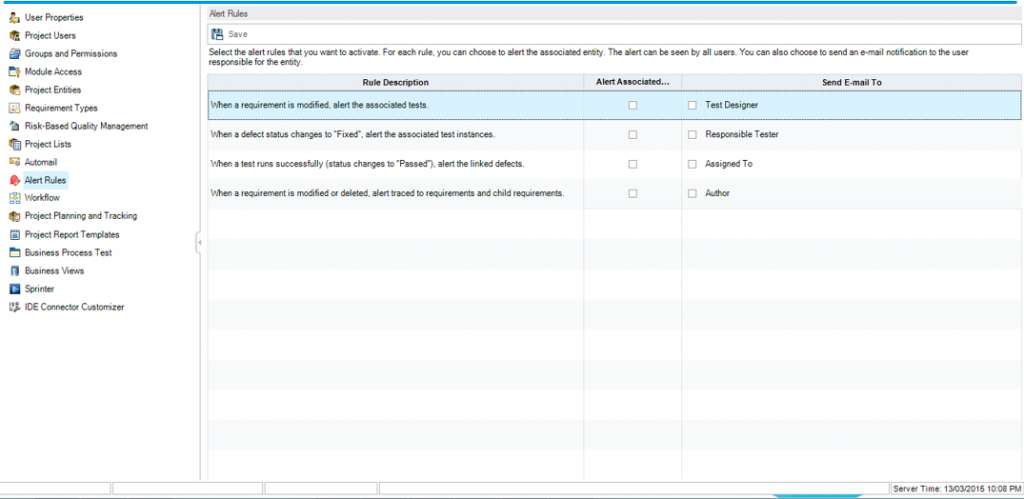
Alert Rules:
When an entity change (requirement, defect, test run) project admin can instruct ALM to notify those responsible for any associated entities that may impact the application management process.
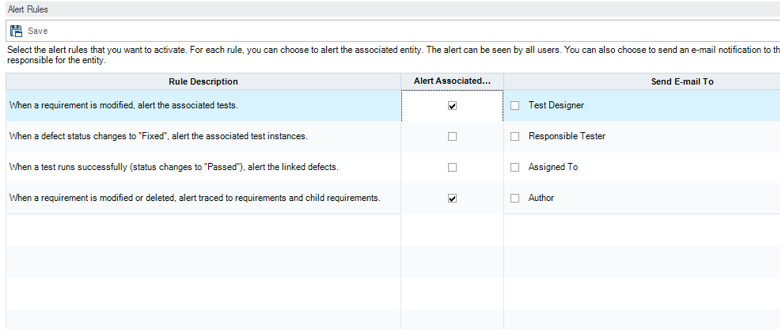
The below setting show that the default alert rules:
The below setting will alerts the both the entities as well as the persons responsible for it.
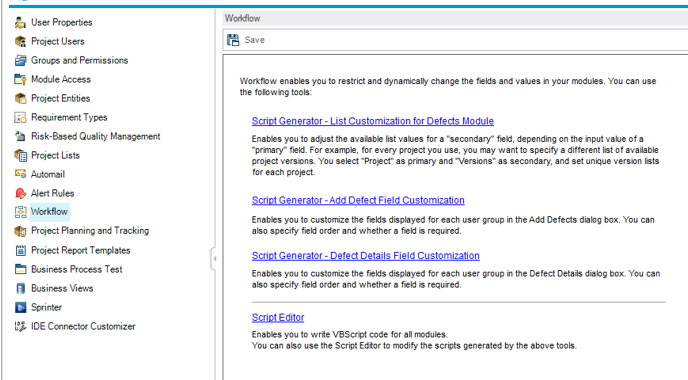
Workflow:
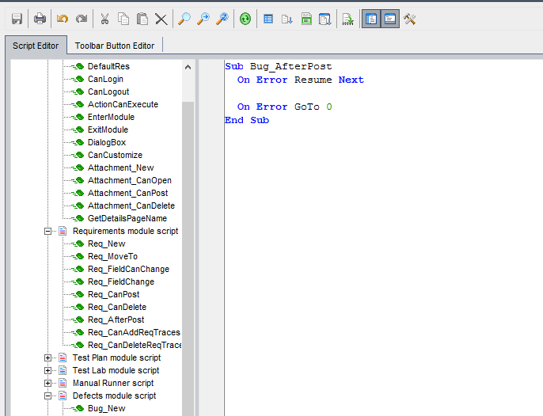
The Workflow module provides links to script generators and a script editor.
Script generators are used to perform customizations on the input fields of the Defects module dialog boxes while the script editor is used to create scripts to control the workflow in any ALM module.
Script Generator - List Customization
When workflow customization is used to change a list of values for a field that has transition rule defined, the field may only be modified in a way that satisfies both the workflow script and the transition rule.
Select Primary field and when it change, user can set an appropriate secondary field.
In the below example, we have selected the primary field as target cycle and priority as secondary field.
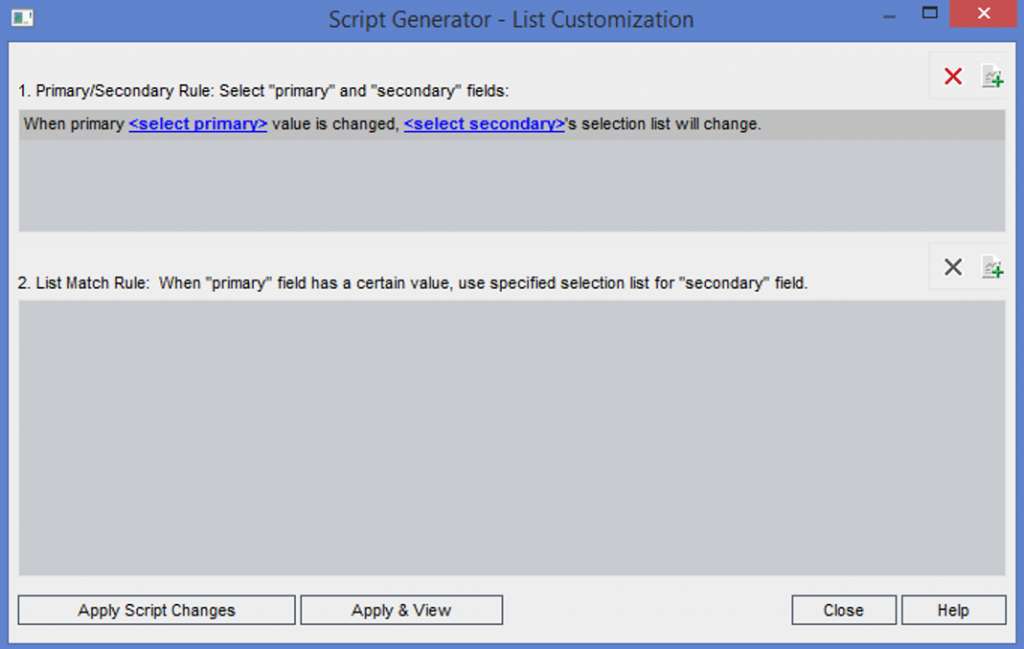
After setting the primary and secondary field, click "Apply Script Change". Upon clicking "Apply and View", the script window will be opened with the scripts placed in appropriate place as well.
Script Generator - Add Defect Field Customization
This module helps project admins to configure the fields that should be displayed in "new defect" dialog for each one of the user profiles. First select the user profiles and by default all the fields are visible to the Admin users in "New Defect" dialog. But, user can push the fields out of visible fields and also make any field mandatory by checking the field "ON" under visible field’s pane.
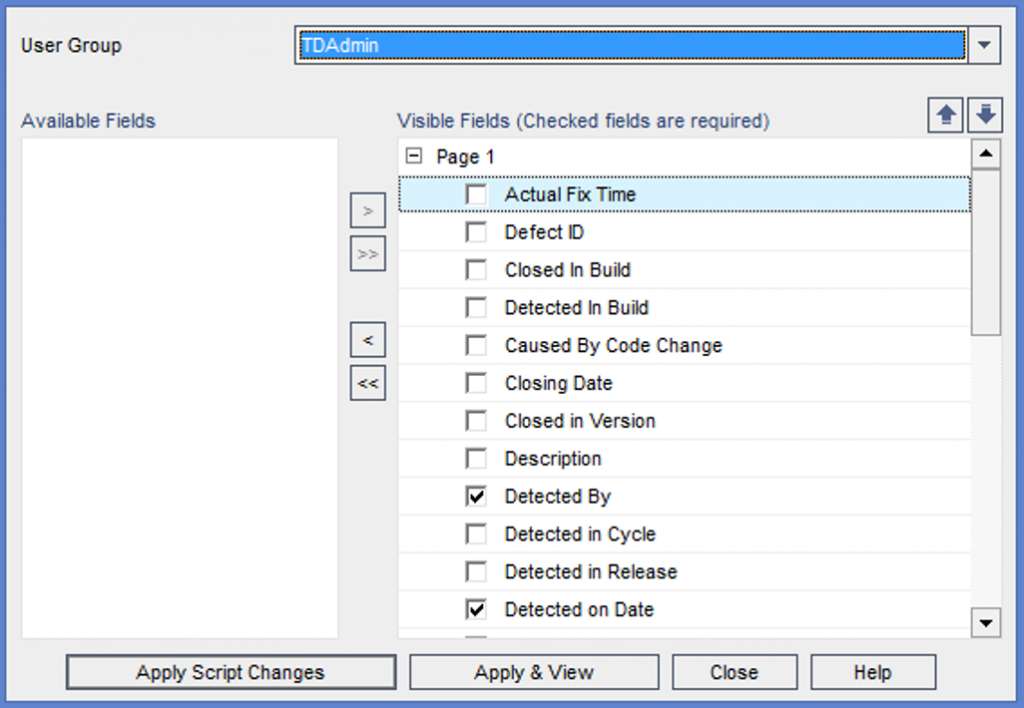
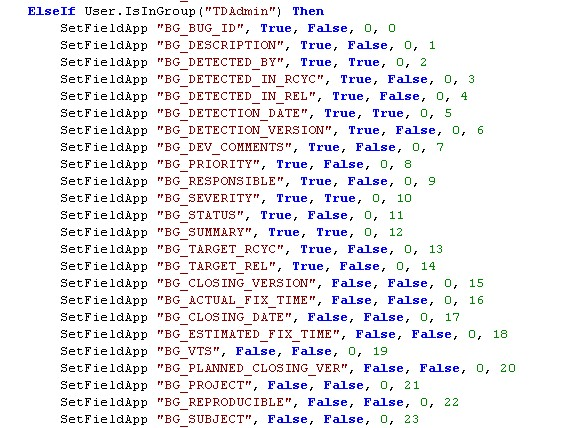
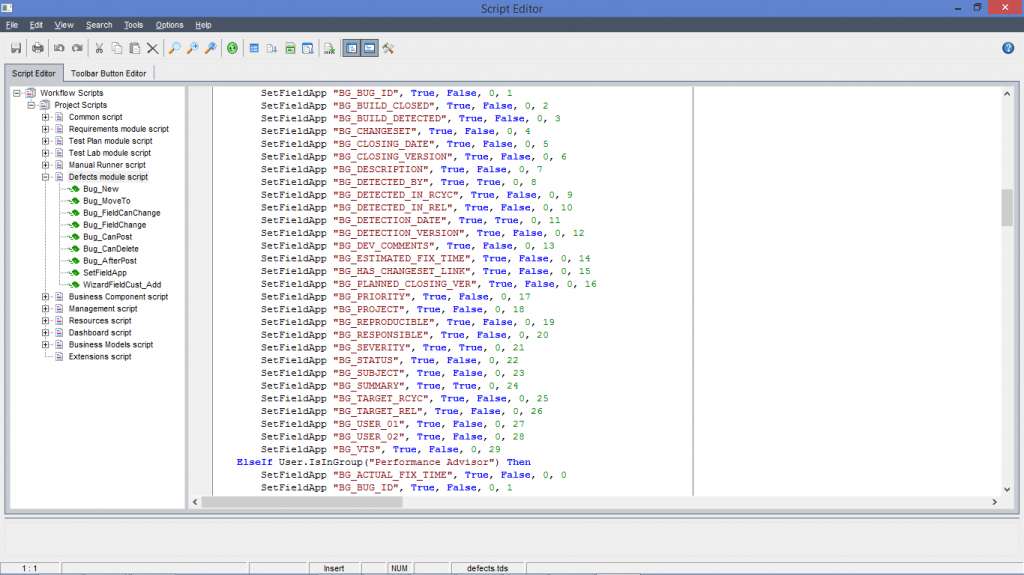
Click on "Apply and View”, the Script editor window opens up. Scroll down and check "TD Admin" profile which we have modified just now.
Following things are to be noted.
- The First Parameters correspond to the Field Name
- The Second parameters correspond to the "Visibility" flag. If Set "True" then it is visible.
- The Third Parameters correspond to the "Mandatory" Flag. If set "True" then it is Mandatory.
- The fourth parameters correspond to the Page Number. If "0" then it will display in the first page.
- The last parameters correspond to the view order. The field with flag 0 will be displayed first and field with flag value "1" will be displayed next and so on.
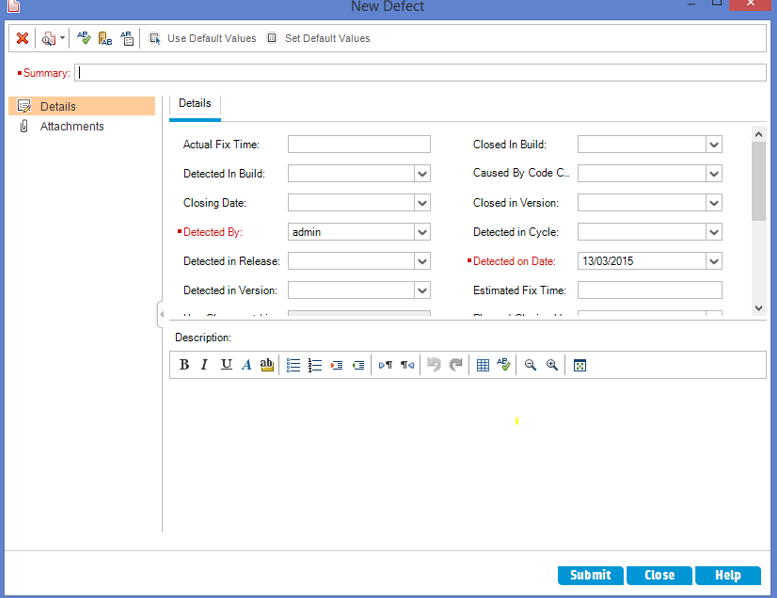
To take a preview of the "TD Admin" user group's "Add Defect" Windows.
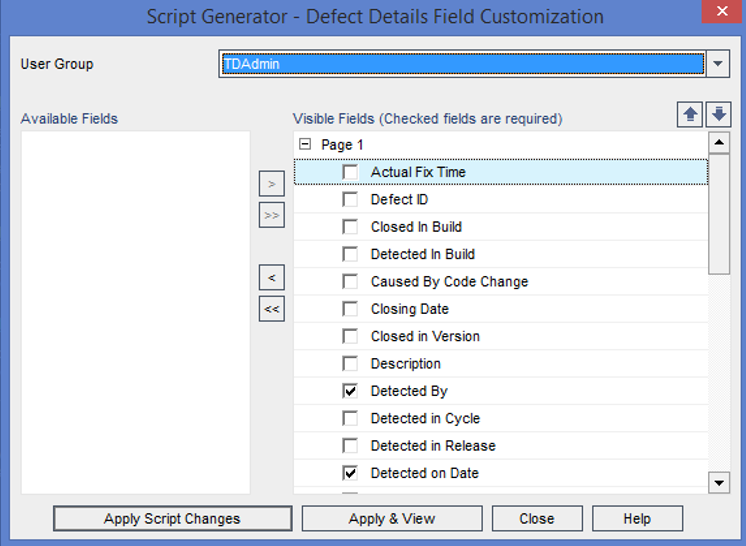
Script Generator - Defect Details Field Customization:
It works the same way as that of "Add Defect Field" Customization. This module helps project admin to configure the fields that should be displayed in "View defect Details" dialog for each one of the user profiles. First select the user profiles and by default all the fields are visible to the Admin users in "View Defects Defect" dialog. But, user can push the fields out of visible fields and also make any fields mandatory by checking the fields "ON" under visible field’s pane.
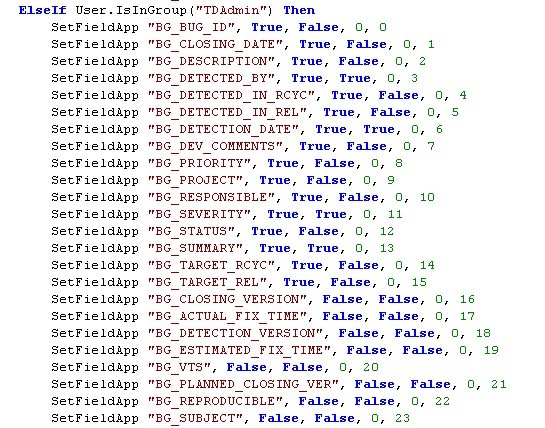
Click on "Apply and View”, the Script editor window opens and shows the changes as script. Scroll down and check "TD Admin" profile which we have modified just now. Following things are to be noted.
- The First Parameters correspond to the Field Names
- The Second parameters correspond to the "Visibility" flags. If Set "True" then it is visible.
- The Third Parameters correspond to the "Mandatory" flags. If set "True" then it is Mandatory.
- The fourth parameters correspond to the Page Numbers. If "0" then it will displayed in the first page.
- The last parameters correspond to the view order. The field with flag 0 will be displayed first and field with flag value "1" will be displayed next and so on.
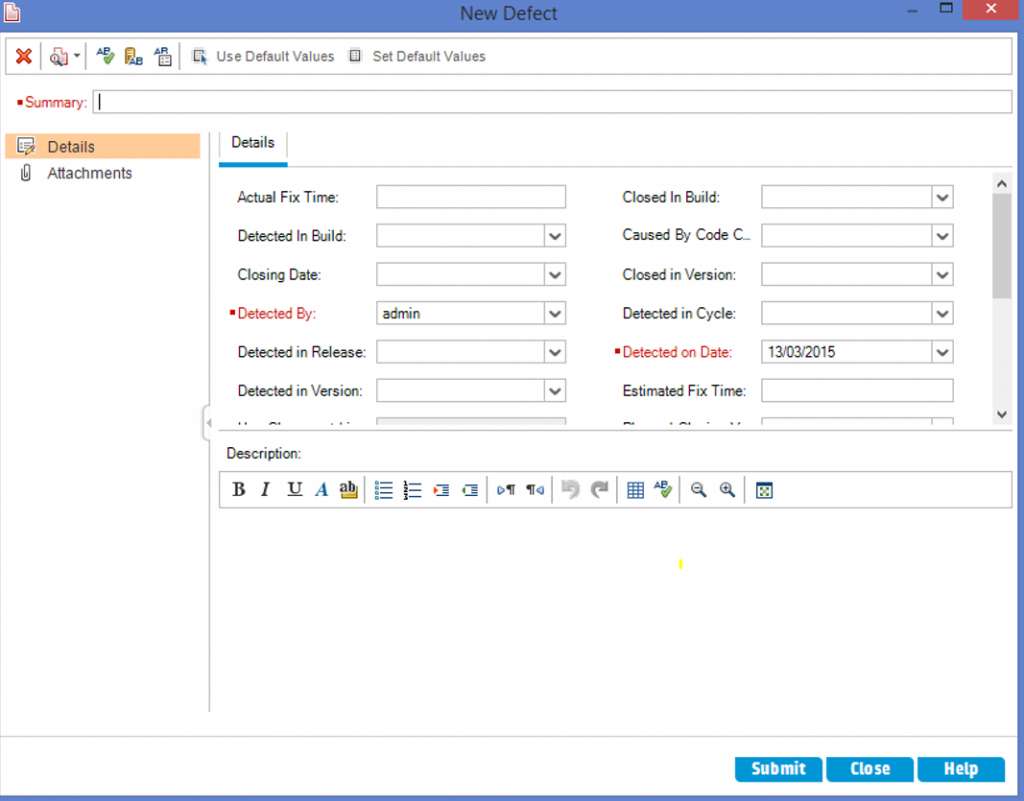
To take a preview of “TD Admin" user group's "View Defect details" Window:
Script Editor
Script Editor Help the project Admin’s to create a user-defined workflow scripts.
This was our quick introduction to HP Quality Center. We covered version 12.2 in this tutorial. Please let us know if you see any errors. Here are some link to help you with further study
Description
Contents of this tutorial includes parts below
- What id HP Quality Center
- Environment Set up
- Configurations on Server Side
- Getting to know some commonly used features
- Management Tab
- Requirements
- Test Plan
- Test Lab
- Integrating QTP with QC
- Defects
- Dashboard Analysis
- Customization
This tutorial is to the point effort to quickly get you started with HP quality center.
Audience
Students looking to get started with HP Quality Center
Learning Objectives
Quickly familiarize yourself with HP Quality Center
Author: Subject Coach
Added on: 23rd Mar 2015
You must be logged in as Student to ask a Question.
None just yet!